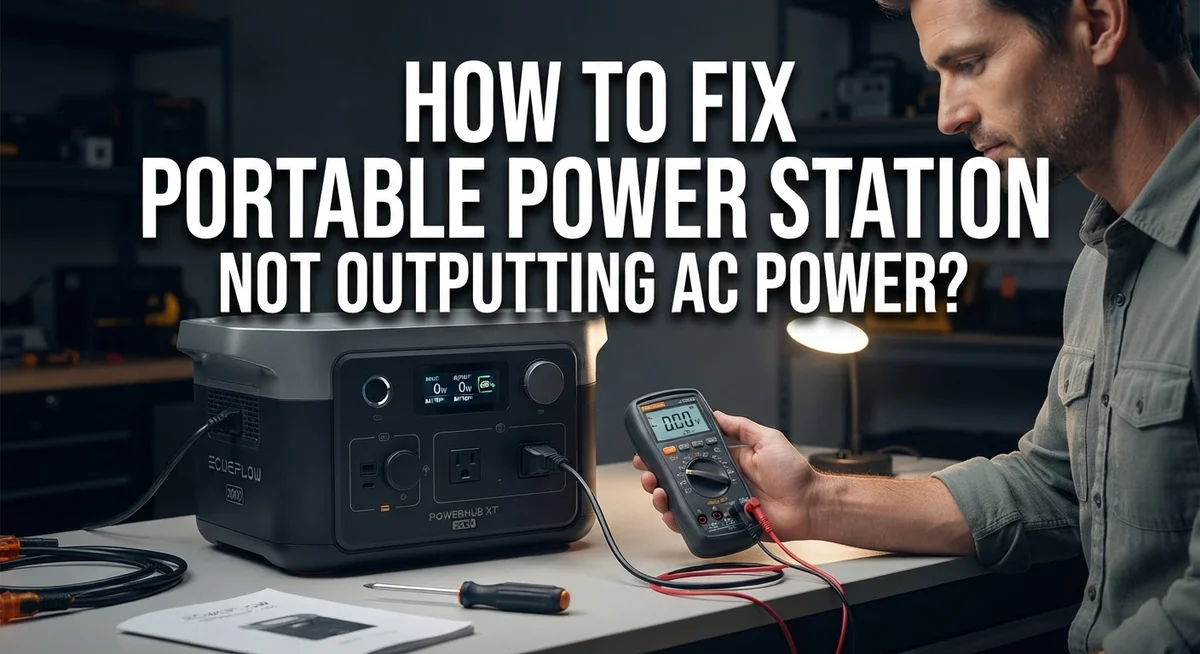
How To Fix Portable Power Station Not Outputting AC Power?
You plug in your device, press the button, and nothing happens. Your portable power station’s AC output is completely dead. This is frustrating, especially when you need power the most.
The good news is that most AC output failures have simple causes. A switched-off AC button, a drained battery, or a triggered overload protection can all stop power delivery instantly. These are easy to fix once you know what to look for.
This guide walks you through every common reason why a portable power station stops outputting AC power. You will learn how to check the basics first, then move into more advanced troubleshooting steps.
In a Nutshell
- AC output failure is usually caused by simple issues like a disabled switch, a drained battery, or triggered overload protection — not always a hardware defect.
- Always check the AC output switch first. It sounds obvious, but this is the most commonly overlooked step.
- A depleted battery will block AC output entirely. Charge the unit fully before testing again.
- Overload protection kicks in when connected devices draw too much power. Disconnect everything, reset the unit, and try again with fewer devices.
- Internal hardware issues like a blown inverter fuse or a failed MOSFET can cause the AC indicator light to turn on while delivering no actual power.
- A factory reset often clears software-triggered faults that stop AC output from working.
Why Your Portable Power Station May Not Output AC Power
Your portable power station may fail to output AC power for several reasons. Understanding these causes helps you fix the problem faster.
Switch settings are the first culprit. The AC output switch might be in the OFF position. This single mistake accounts for most AC output failures. Always verify the switch sits in the ON position before troubleshooting further.
Battery charge level directly affects AC output. A power station with insufficient charge cannot deliver AC power. The unit protects itself by blocking output when battery levels drop too low. You need adequate charge stored before AC power becomes available.
Overload protection is a safety feature. When connected devices demand more power than the unit can safely provide, the protection system activates. This stops AC output immediately to prevent damage. The overload light typically illuminates when this occurs.
Internal inverter problems create a different scenario. The inverter converts DC battery power into AC power for your devices. A blown fuse inside the inverter prevents this conversion. A failed MOSFET component produces similar results. Both issues cause the AC indicator light to turn on, yet no power reaches your outlets.
Damaged charging ports or cables prevent proper charging. If the battery never charges fully, AC output remains blocked. Inspect all charging connections for loose contacts or visible damage.
Software glitches occasionally disable AC output. A power station’s internal system can malfunction and lock out AC power. This happens even when hardware functions normally. A factory reset often resolves these software issues.
Shipping damage affects brand new units. Portable power stations can sustain internal damage during transport. Check for physical damage and verify all cables arrived with your unit.
Step 1: Check the AC Output Switch and Basic Settings
Start by locating the AC output switch on your power station. This switch controls whether AC power flows to your outlets. Look for a button or toggle labeled “AC” or “AC Output” on the unit’s control panel. Press or flip it to the ON position.
Next, verify the switch actually responds. Press it several times and listen for a click sound. A functioning switch produces a distinct mechanical response. If you hear nothing, the switch may be damaged and need professional repair.
Check your unit’s display screen or indicator lights. Most power stations show an AC indicator light when the output is active. If the light doesn’t turn on after switching, move to the next diagnostic step. Some units have separate switches for AC and DC outputs, so confirm you’re toggling the correct one.
Look at your battery charge level. The display should show a percentage or bar indicator. Many power stations require at least 20 to 30 percent battery charge before AC output activates. This is a safety feature to prevent complete battery depletion. If your battery is low, connect the unit to a charger immediately.
Test the AC switch under different battery levels. Charge your power station to 50 percent, then try the AC switch again. If it works at higher charge levels but not lower ones, your battery simply needs more power.
Finally, check if your unit has a separate power button. Some models require you to press a main power button before the AC switch becomes functional. Read your manual’s control panel section to understand your specific model’s button layout and sequence.
Step 2: Verify Battery Charge Level and Power Input
Your battery charge level is the foundation for AC power output. Most portable power stations require a minimum charge threshold before AC outlets activate. This is a built in safety feature that prevents damage to the inverter and connected devices.
Start by checking your unit’s display screen or LED indicators. Look for the battery percentage readout. If your power station shows less than 10 to 20 percent charge, this is likely your problem. Low battery levels automatically disable AC output to protect internal components.
Connect your power station to a wall outlet using the included charging cable. Let it charge for at least 30 minutes to an hour. Some units need to reach 15 to 20 percent charge before AC power becomes available. Others require 50 percent or higher for full AC functionality.
While charging, verify the charging cable is fully inserted into both the power station and wall outlet. Check that the charging port shows activity like an indicator light or display notification. A loose connection prevents proper power input.
After charging, retest the AC output switch. Turn it ON and listen for the inverter to hum or activate. This sound indicates the AC circuit is now receiving power from the battery.
If your battery charges successfully but AC output still fails, move to testing the power input system itself. This helps identify whether the charging system works properly. A unit that won’t charge fully suggests a different problem than one that charges but won’t output power.
Document your battery percentage at each step. This information helps you understand your unit’s specific charge requirements and troubleshoot more effectively.
Step 3: Identify and Reset Overload Protection
Overload protection is a safety mechanism that automatically shuts down AC output when connected devices demand more power than your unit can safely deliver. This feature prevents damage to internal components and battery degradation.
To identify if overload protection triggered, look for specific indicator lights on your power station’s display panel. Many units show a red light, warning symbol, or “overload” message when this protection activates. Some models emit a beeping sound as an alert.
Check what devices you connected when AC output stopped working. High power devices like air compressors, power tools, or space heaters frequently trigger overload protection. Even multiple devices running simultaneously can exceed your unit’s safe output capacity.
Disconnect all devices from the AC outlets immediately. This is the first step to reset overload protection. Wait 30 seconds before reconnecting anything.
Next, power off your entire unit using the main power button. Leave it off for one to two minutes. This waiting period allows the internal circuits to fully discharge and reset their protective systems.
Turn the power station back on. The overload protection should now reset to normal operating status. Your AC output switch should function again.
Reconnect devices one at a time, starting with lower power items. This approach helps you identify which device caused the overload issue. Avoid running multiple high power devices simultaneously in the future.
If overload protection keeps triggering even with single, low power devices connected, your unit may have an internal inverter problem. This requires professional service or replacement. Document when the protection activates and which devices cause it. This information helps technicians diagnose the actual issue accurately.
Step 4: Inspect for Internal Inverter or Fuse Issues
When AC output fails despite proper switch settings and sufficient battery charge, internal inverter or fuse problems likely exist. These components convert DC battery power into AC electricity for your outlets.
Start by powering down your unit completely. Wait at least 30 seconds before restarting. This simple reset sometimes clears temporary inverter errors. After restart, test the AC output switch again to see if power returns.
Next, listen carefully when you flip the AC switch. A healthy inverter produces a soft clicking or humming sound. Silence or unusual buzzing suggests internal component failure. The AC indicator light may glow, but no actual power reaches your outlets when the inverter fuse is blown.
Check your unit’s manual for the fuse location. Most portable power stations house the inverter fuse in an accessible compartment near the AC output terminals. Look for a small cylindrical component, typically glass or plastic with metal caps on each end. A blown fuse appears dark, discolored, or has a broken internal wire visible through the glass.
Do not attempt to replace the fuse yourself unless your manual explicitly permits this. Incorrect fuse installation or using the wrong amperage rating creates fire hazards and permanent damage.
If your unit shows no physical damage to the fuse, the MOSFET component (which controls power delivery) may have failed. This requires professional repair or replacement.
Document everything you observe: whether the AC light turns on, any sounds from the unit, and exact timing of when AC output stopped. This information helps technicians diagnose the specific internal problem quickly.
Step 5: Perform a Full System Reset
A full system reset clears internal settings and can resolve software related AC output failures. This step works best after you’ve ruled out battery depletion, overload protection, and basic switch issues.
Begin by powering down your unit completely. Press and hold the main power button for at least 5 to 10 seconds until all lights disappear. This ensures the device shuts down fully rather than entering standby mode.
Leave your power station unplugged and powered off for a minimum of 2 to 3 minutes. This waiting period allows internal capacitors to discharge completely and resets the system’s memory.
While waiting, locate your unit’s manual and search for reset instructions specific to your model. Some power stations have a dedicated reset button, while others require holding multiple buttons simultaneously. Check your manual before proceeding to avoid accidental damage.
After the waiting period, plug your unit back into a wall outlet using the original charging cable. Allow it to charge for at least 15 to 20 minutes. During this time, the internal systems reinitialize and recalibrate.
Once charging is complete, power on your unit using the main button. Wait for all startup lights and sounds to finish before testing anything.
Now test your AC output switch. Flip it on and listen for the inverter to activate. You should hear a subtle click or hum sound.
If AC power still doesn’t output after a full reset, the issue likely involves internal hardware failure rather than software problems. Document what you observe and prepare to contact technical support with this information. A successful reset followed by continued AC failure points toward inverter or fuse replacement needs.
Common Mistakes to Avoid When Troubleshooting AC Output
Many people make simple mistakes when troubleshooting AC power problems. These errors can waste your time and potentially damage your power station further.
The most common mistake is ignoring the AC output switch position. Many users assume their unit is broken when the AC switch simply sits in the OFF position. Always verify this switch is fully turned ON before assuming hardware failure. Check your unit’s display panel for the AC indicator light. This light confirms the switch activated correctly.
Another frequent error involves attempting AC output with a depleted battery. Your power station needs sufficient charge to deliver AC power. Don’t skip this step. Check your battery percentage on the display. If the battery reads below 20 percent, charge your unit first before testing AC outlets.
People often overlook basic power input verification. Before assuming internal failure, confirm your unit actually receives charging power. Plug your power station into a wall outlet using the original charging cable. Listen for fan noise or watch for charging indicator lights. This simple check eliminates input problems from your diagnosis.
Connecting too many devices at once creates another common mistake. Overload protection activates when power demands exceed your unit’s capacity. Test AC outlets with a single, low power device first. This approach identifies whether overload protection triggered or if a genuine hardware problem exists.
Finally, avoid attempting repairs without consulting your manual. Replacing internal fuses or components incorrectly can cause permanent damage. Your manual contains model specific instructions. Follow these guidelines exactly. When in doubt, stop troubleshooting and contact customer support instead of risking further damage to your power station.
When to Seek Professional Repair or Contact Support
If you’ve worked through basic troubleshooting steps without success, it’s time to consider professional help. Know when DIY efforts end and expert repair begins.
Contact the manufacturer’s support team first. Most companies offer phone, email, or chat support for AC output issues. Have your unit’s model number, purchase date, and a description of the problem ready. Support staff can often diagnose issues remotely and may authorize warranty repairs if your unit qualifies.
Check your warranty coverage before contacting support. Many portable power stations include one to three year warranties that cover inverter failures and internal component defects. Warranty repairs are typically free or low cost. If your warranty has expired, ask about repair costs upfront.
Visit an authorized service center if available in your area. These facilities have proper diagnostic equipment and genuine replacement parts. They can test your inverter, MOSFET, and other internal components accurately.
Consider professional repair when:
Your unit is still under warranty and AC output completely fails. You see visible damage to internal components when inspecting the fuse area. The AC switch clicks but produces no power output. Your battery charges fully but AC still won’t work. You’ve completed all reset and troubleshooting steps without results.
Avoid attempting inverter or MOSFET replacement yourself unless you have electronics repair experience. These components require proper tools and technical knowledge. Incorrect installation can cause safety hazards or permanent damage.
Document everything before contacting support. Take photos of your unit, note when the problem started, and list all troubleshooting steps you’ve completed. This information helps technicians diagnose your issue faster and more accurately.
Final Thoughts
Fixing a portable power station that won’t output AC power is usually straightforward when you follow a clear process.
Start with the simplest checks first. Verify your AC output switch is turned on, confirm your battery has enough charge, and make sure you’re not triggering overload protection with too many connected devices.
Most AC output failures come down to one of four causes: a disabled switch, a depleted battery, overload protection activation, or an internal hardware fault like a blown inverter fuse or failed MOSFET component.
Work through each step methodically before assuming the worst. A quick reset often resolves software-related issues that prevent AC power delivery, even when the AC indicator light appears active.
Always verify basic power input before moving to advanced troubleshooting. Confirming your unit charges properly through a wall outlet rules out battery and input problems early.
If the AC light activates but no power reaches your connected devices, this strongly points to an internal inverter fuse or MOSFET failure. These are hardware issues that require professional attention.
Keep your manual nearby throughout the process. Manufacturer-specific reset procedures and output specifications vary between units, and your manual gives you the most accurate guidance.
Know your limits when troubleshooting. Internal component repairs like inverter or MOSFET replacement carry real risk without proper electronics experience.
Document every step you take and every symptom you observe. This information becomes valuable when contacting manufacturer support or visiting a service center.
Most AC output problems are solvable with patience and a logical approach. Start simple, stay systematic, and escalate to professional support only when basic troubleshooting confirms a hardware fault.
Frequently Asked Questions
Why is my AC output switch on but still no power?
The AC switch position is just one piece of the puzzle. Your battery charge level matters too. If your battery sits below 20%, the unit may block AC output as a safety feature. Check your battery percentage first. Also inspect whether overload protection has triggered. This happens when you connect devices drawing more power than the unit can supply. Try unplugging all devices, then power cycle the unit completely.
What does it mean when the AC light turns on but devices don’t work?
This is a specific sign pointing to internal inverter problems. Your unit detects AC mode is active, but power isn’t actually reaching your outlets. An internal inverter fuse may have blown, or a MOSFET component failed. These are internal component failures that require professional service. Don’t attempt to open the unit yourself.
How do I reset my power station properly?
Most units have a reset button or require a specific shutdown sequence. Hold the power button for 10 to 15 seconds until all lights turn off. Wait 30 seconds, then power the unit back on. Check your manual for your model’s exact reset procedure, as methods vary between brands. After resetting, test the AC output with a simple device like a phone charger.
Can a depleted battery completely block AC output?
Yes. When battery charge drops too low, the unit prioritizes protection over functionality. Plug your unit into mains power and charge it fully. This takes several hours depending on your unit’s capacity. Once fully charged, test AC output again. Many users mistake this safety feature for a broken unit.
Should I attempt internal repairs myself?
No. If basic troubleshooting fails, contact manufacturer support instead. Inverter and MOSFET repairs require electronics expertise. Opening the unit yourself may void your warranty and create safety hazards.

Hi, I’m Siya — the founder and writer behind Craftifyy.com. I’m a tech enthusiast who loves reviewing gadgets, comparing products, and helping people make smarter buying decisions. Got a question? Feel free to reach out!