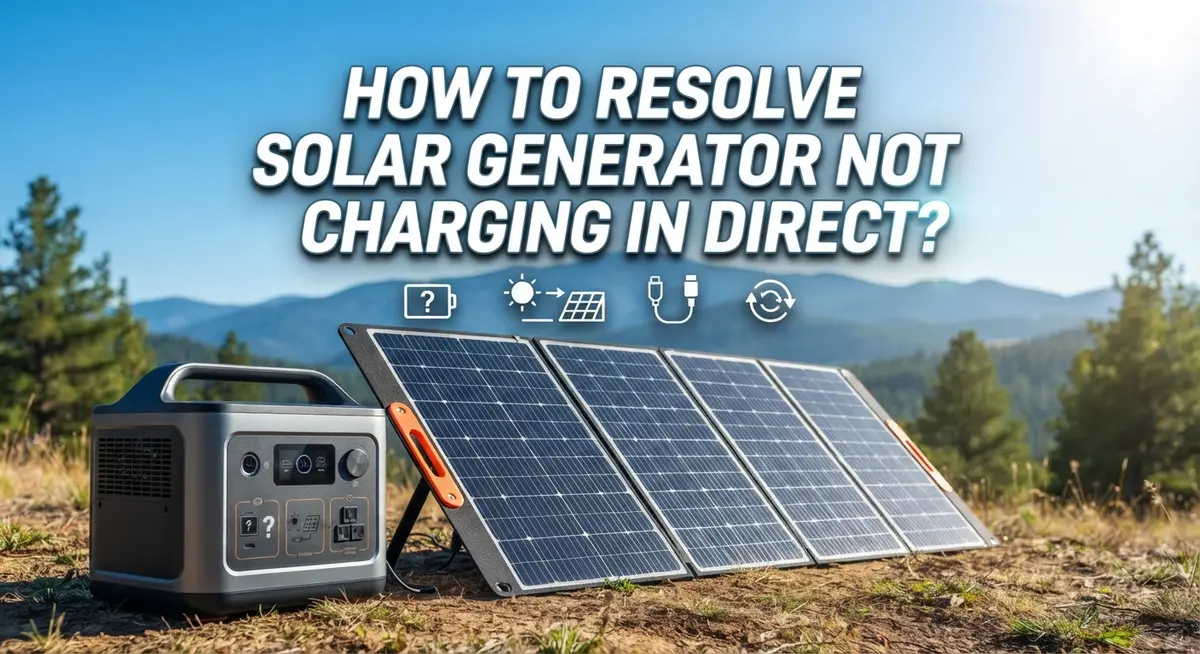
How To Resolve Solar Generator Not Charging In Direct Sunlight?
Your solar generator sits in full sunlight, but the battery barely moves. This is one of the most frustrating problems a solar generator owner can face.
The good news? Most causes are simple to find and fix yourself.
Direct sunlight is essential for fast, efficient charging. Indirect light will charge your system, but it works much slower. When something breaks that process, your battery suffers and your power supply becomes unreliable.
Several issues can cause this problem. Dirty panels, loose wiring, a failing battery, or a faulty charge controller are the most common culprits. Each one cuts off or weakens the flow of energy before it ever reaches your battery.
This guide walks you through every major cause of a solar generator not charging in direct sunlight.
Let’s get your solar generator charging the way it should.
In a Nutshell
- Solar generators need direct sunlight to charge efficiently. Indirect or shaded light slows the process significantly.
- Dirty panels are a top cause. Dust, grime, and debris block sunlight from reaching the solar cells properly.
- Loose wiring connections interrupt power flow. Always inspect and tighten all visible connections before assuming a bigger problem exists.
- Battery degradation is a common hidden cause. An old or worn battery may no longer hold or accept a full charge, even in perfect sunlight.
- Your charge controller may need a reset. A simple reset can restore normal charging behavior if the controller has malfunctioned.
- Monitoring your system regularly helps catch problems early. Use a monitoring app or display to track charging performance and spot drops in output.
Why Your Solar Generator May Stop Charging Even in Direct Sunlight
Your solar generator stops charging in direct sunlight for several specific reasons. Understanding these causes helps you fix the problem quickly.
Battery degradation is one of the most common culprits. Solar generator batteries age over time. As they get older, they lose the ability to accept a full charge. Internal cells may fail or weaken. Even in perfect sunlight, a degraded battery simply cannot store energy efficiently. Testing your battery with a grid powered charger reveals whether this is your issue.
Loose wiring connections interrupt the flow of power from your panels to the battery. These connections loosen due to vibration, temperature changes, or regular use. A loose wire acts like a broken circuit. Power cannot travel where it needs to go. Your system appears to charge nothing, even though sunlight hits the panels directly.
Dirty solar panels block sunlight from reaching the cells underneath. Dust, pollen, bird droppings, and grime accumulate on panel surfaces. This layer reduces how much light penetrates to the solar cells. Your panels generate less power than they should. Charging slows dramatically or stops entirely.
Charge controller malfunctions prevent power from reaching your battery correctly. This device regulates voltage and current from your panels. If it fails or malfunctions, it blocks charging even when conditions are perfect. A simple reset often restores normal function.
Insufficient direct sunlight exposure matters more than you think. Shade from trees, buildings, or clouds reduces charging speed significantly. Your panels may receive partial light rather than full, direct sunlight. This delivers much less power than optimal conditions.
Each of these issues has straightforward solutions. Identifying which one affects your system is the first step toward getting your solar generator working again.
How to Inspect and Clean Your Solar Panels for Maximum Efficiency
Dirty solar panels are one of the most common reasons your solar generator won’t charge properly. Dust, pollen, bird droppings, and grime create a barrier that blocks sunlight from reaching the cells underneath. Even a thin layer of dirt can significantly reduce charging speed.
Start by checking your panels visually. Look for any visible dust, debris, or discoloration on the surface. If you see buildup, cleaning is your next step. Use a soft brush or microfiber cloth to gently remove loose dirt and dust. Avoid scratching the panel surface, as damage reduces efficiency.
For stubborn grime, use distilled water and a soft cloth. Tap water can leave mineral deposits that interfere with charging. Wipe gently in one direction rather than scrubbing back and forth. Never use harsh chemicals or abrasive materials on your panels.
Pay special attention to the edges and corners where dirt tends to collect. These areas block sunlight just as effectively as the center of the panel. Make sure you clean all sides of every panel in your system.
Check your panels regularly, especially after storms, windy weather, or dusty conditions. Monthly cleaning during dry seasons keeps your system running at peak performance. In rainy areas, you may need to clean less often since rain naturally washes away some debris.
After cleaning, place your panels back in direct sunlight and monitor the charging rate. You should notice an improvement almost immediately if dirty panels were the problem. Clean panels absorb more sunlight and convert it to power more efficiently, getting your solar generator back to normal charging speeds.
How to Check and Secure Wiring Connections in Your Solar System
Wiring connections are critical to your solar system’s performance. Loose or corroded wires prevent power from flowing between your solar panels, charge controller, and battery. This interruption stops charging even when panels receive direct sunlight.
Start by visually inspecting all visible connections. Look at the cables connecting your panels to the charge controller and the controller to your battery. Check for any wires that appear loose, frayed, or discolored. Corrosion appears as a white, blue, or green crusty buildup on metal terminals.
Turn off your entire system before touching any connections. Safety comes first when working with electrical components. Most solar generators have a main disconnect switch you should use.
Tighten all terminal connections carefully. Use the appropriate wrench or socket to secure each connection point. Do not overtighten, as this can damage terminals. A snug fit is what you need. You should not be able to wiggle wires by hand once properly secured.
Inspect the actual wires for damage. Look for cuts, burns, or exposed copper inside the insulation. Damaged wires reduce power transfer efficiency and create safety hazards. If you find damaged sections, the affected cable segment needs replacement.
Check connection points where wires meet terminals. These joints should be clean and free from dirt or oxidation. Gently clean corroded terminals with a soft brush or cloth.
Monitor your charging rate after securing connections. Use your system’s display or monitoring app to verify improved performance. Better connections directly translate to faster charging speeds in direct sunlight.
Repeat this inspection monthly or after extreme weather events. Regular maintenance prevents future charging problems and extends your system’s lifespan significantly.
How to Diagnose and Reset a Faulty Charge Controller
A faulty charge controller stops your solar generator from receiving power, even when panels sit in bright sunlight. The charge controller acts as a gatekeeper between your solar panels and battery. When it fails, power cannot flow properly.
Start by checking your system’s display or monitoring app. Look for error codes or unusual readings. Many charge controllers show specific fault messages that tell you exactly what went wrong. Write down any codes you see. These codes help you understand the problem better.
Next, perform a manual reset on your charge controller. Most controllers have a reset button or switch. Turn off your entire system first. Wait 30 seconds. Then turn it back on. This simple step often fixes temporary glitches that prevent charging.
If the reset doesn’t work, check the controller’s physical connections. Loose cables behind the controller reduce power flow significantly. Turn off your system. Inspect every wire connected to the controller. Tighten any loose connections you find. Pay special attention to the terminals where wires attach.
Monitor your charging rate after making these changes. Watch your system’s display for 10 to 15 minutes. You should see the charging percentage increase steadily. If nothing changes, your controller may need professional service or replacement.
Temperature also affects charge controller performance. Controllers work best between 50°F and 104°F. Extreme heat or cold can cause temporary shutdowns. If your controller is very hot, allow it to cool before testing again.
Document all your troubleshooting steps. Note the time, date, and results. This information helps technicians diagnose deeper issues if problems continue.
How to Test Your Solar Generator Battery for Degradation or Failure
Testing your battery helps you find problems before they get worse. A degraded or failing battery won’t charge properly, even when your solar panels work perfectly.
Start by checking your battery’s voltage. Use a multimeter to measure the voltage when your system sits idle. Compare this reading to your battery’s rated voltage. If the actual voltage is significantly lower than expected, your battery may be degraded.
Next, perform a load test. Connect a known electrical load to your solar generator and monitor how long it powers the device. A healthy battery should sustain the load for its rated time. If your battery dies much faster than expected, degradation has likely occurred.
Watch for swelling or unusual heat from your battery. Physical changes indicate internal failure. Feel the battery casing carefully. Excessive warmth during charging suggests internal resistance problems. Swelling means the battery is deteriorating and needs attention soon.
Use your system’s monitoring app if available. These apps display real time voltage, current, and temperature data. Look for unusual spikes or drops in voltage. Inconsistent readings point to battery issues rather than panel or controller problems.
Test your battery with a grid powered charger as a final step. Connect your battery to a standard wall charger in a safe location. If the battery won’t accept a charge from the grid charger, internal failure is confirmed. If it charges normally from the wall but not from solar panels, the issue lies elsewhere in your system.
Document all your test results. Write down voltage readings, load test times, and any physical observations. This information helps you understand whether your battery needs replacement or if another component needs fixing.
How to Use System Monitoring Tools to Identify Charging Problems
System monitoring tools give you real time data about your solar generator’s performance. These tools help you spot charging problems before they become serious issues.
Start by accessing your system’s built in display or mobile app. Most solar generators show voltage readings, current flow, and power output. Check these numbers regularly to understand how your system behaves in direct sunlight.
Look for patterns in your charging data. If your system charges quickly on sunny days but slowly on cloudy days, your panels are working correctly. If your system fails to charge even in bright sunlight, the monitoring data reveals where the problem exists.
Pay attention to voltage readings on your charge controller. A healthy system shows steady voltage increases as sunlight hits the panels. Sudden drops or flat readings indicate connection issues or controller problems.
Monitor your battery’s state of charge percentage. This number tells you if energy actually reaches your battery. A stuck percentage means power isn’t flowing from your panels to your battery storage.
Compare your system’s performance across different times and weather conditions. Record these readings in a simple notebook or digital file. This documentation helps you identify whether problems happen consistently or only under specific circumstances.
Check your monitoring app for error codes or warning messages. These alerts point directly to failing components. Some systems display temperature warnings, which indicate overheating controllers or batteries.
Use your monitoring tools to test charging speed. A healthy system in direct sunlight should show increasing power output within minutes. If output stays flat or decreases, your monitoring data confirms a genuine problem exists rather than user error.
Common Mistakes That Prevent Your Solar Generator From Charging Properly
Many people make simple mistakes that stop their solar generators from charging properly. Understanding these errors helps you fix problems faster and avoid frustration.
Relying on indirect sunlight is the biggest mistake. Shade, clouds, and diffused light slow down your charging speed significantly. Your solar panels need direct, unobstructed sunlight to work at full power. Even partial shade from trees or buildings reduces your charging rate by 50% or more. If you want fast charging, position your panels where the sun hits them directly throughout the day.
Neglecting panel maintenance causes major efficiency losses. Dust, dirt, pollen, and bird droppings block sunlight from reaching your cells. Many people forget that panels need regular cleaning to stay effective. Wipe your panels with a soft cloth and mild soap every few weeks. This simple step prevents your generator from underperforming.
Ignoring loose connections interrupts power flow completely. Wires can loosen over time from vibration, temperature changes, or weather. A loose connection stops charging even when everything else works fine. Check all visible wiring where cables meet terminals and connectors. Tighten any loose connections you find.
Skipping system monitoring leaves you blind to problems. Your solar generator has a display or mobile app that shows real time data. Many users never check these tools, so they miss early warning signs. Monitor your charging rate regularly to spot issues before they worsen.
Not testing your battery leads to missed degradation. Batteries lose capacity over time. Testing helps you identify failing cells early. Use your system’s monitoring app or perform a load test to check battery health.
Avoiding these mistakes keeps your solar generator working at peak performance.
Tips for Maintaining Optimal Solar Generator Charging Performance
Keeping your solar generator running at peak performance requires consistent attention to a few key areas. Direct sunlight is essential for fast and efficient charging. Your panels need clear, unobstructed access to the sun throughout the day.
Clean your solar panels every two to four weeks, depending on your environment. Dust, pollen, and debris reduce charging efficiency significantly. Use soft cloths and mild soap with water. Avoid abrasive materials that scratch the panel surface.
Position your solar generator where panels face the sun directly. Even slight angles away from direct rays slow charging speed considerably. Morning and afternoon sun works well, but midday sun provides the strongest charging power.
Check all wiring connections regularly. Vibration, temperature changes, and weather exposure loosen connections over time. Inspect visible wires and terminals for corrosion or damage. Tighten connections carefully if you find them loose.
Monitor your system’s performance using the built in display or mobile app. Track voltage readings and charging speed patterns. This helps you spot problems early before they become serious issues.
Keep your battery at moderate temperatures. Heat speeds up battery degradation, while cold slows charging. Store your generator in shade when not in use.
Rotate your panel position seasonally if possible. Summer sun angles differ from winter angles. Adjusting panel tilt helps maintain consistent charging throughout the year.
Test your battery periodically using a grid powered charger. This reveals whether your battery holds a full charge or shows signs of degradation. Early detection prevents complete charging failures.
Balance your electrical load with available charging power. Heavy loads drain the battery faster than solar panels can recharge it. Reduce power consumption during cloudy periods or low sunlight hours.
Final Thoughts
A solar generator that refuses to charge in direct sunlight is a frustrating problem, but it is almost always fixable.
The most common causes are simple ones. Dirty panels, loose wiring, a failing battery, or poor positioning are behind most charging failures. Each of these has a clear, practical solution you can apply yourself.
Start with the basics before assuming the worst. Clean your panels, check your connections, and confirm your panels are getting true direct sunlight. These three steps alone solve the majority of charging issues.
Battery health is often overlooked. If your panels and wiring check out fine, test your battery with a grid-powered charger. A load test will reveal whether degraded cells are preventing a full charge.
Your charge controller also plays a key role. Resetting it can clear faults that block power flow between your panels and battery. Never skip this step during troubleshooting.
Consistent maintenance prevents most problems from ever starting. Regular cleaning, connection checks, and seasonal panel repositioning keep your system performing at its best throughout the year.
System monitoring gives you early warnings. Voltage readings, state of charge percentages, and error codes all tell you when something needs attention before it becomes a bigger issue.
Do not wait for a complete charging failure to take action. Small drops in performance are early signs that something needs fixing.
Solar generators are reliable when maintained properly. Most charging problems come from neglect, not equipment failure.
Follow the troubleshooting steps in this guide consistently. You will keep your solar generator charging efficiently and extend its working life significantly.
Frequently Asked Questions
Why isn’t my solar generator charging even in direct sunlight?
Several issues can prevent charging in direct sunlight. Dirty solar panels block sunlight from reaching the cells. Loose wiring connections interrupt power flow to your battery. Battery degradation means older batteries won’t hold a full charge anymore.
Check each of these first. Clean your panels, inspect all visible wires, and test your battery with a grid powered charger to identify the real problem.
Do solar generators need direct sunlight to charge?
Yes, direct sunlight is essential for efficient charging. Indirect light charges much slower than direct rays. Shade, clouds, and diffused light reduce your charging speed significantly.
Position your panels to face the sun directly. Avoid placing your generator under trees or near buildings that cast shadows.
How do I know if my battery is failing?
A failing battery won’t charge fully even when panels and connections work perfectly. Use a grid powered charger to test your battery separately from the solar panels.
If the battery charges normally with grid power but not with solar panels, your charge controller may need a reset. If the battery won’t charge with either method, your battery cells are degraded and need replacement.
What should I check first when my solar generator stops charging?
Start with the basics. Clean your solar panels thoroughly to remove dust, dirt, and pollen. Check all wiring connections and tighten any loose cables.
Verify your panels receive direct sunlight without shade. Use your system’s display or mobile app to monitor real time performance data.
How often should I maintain my solar panels?
Clean your panels every two to four weeks depending on your environment. Areas with high dust, pollen, or bird activity need more frequent cleaning.
Check wiring connections monthly. Vibration and temperature changes loosen connections over time. Monitor your system’s performance regularly using built in tools.

Hi, I’m Siya — the founder and writer behind Craftifyy.com. I’m a tech enthusiast who loves reviewing gadgets, comparing products, and helping people make smarter buying decisions. Got a question? Feel free to reach out!