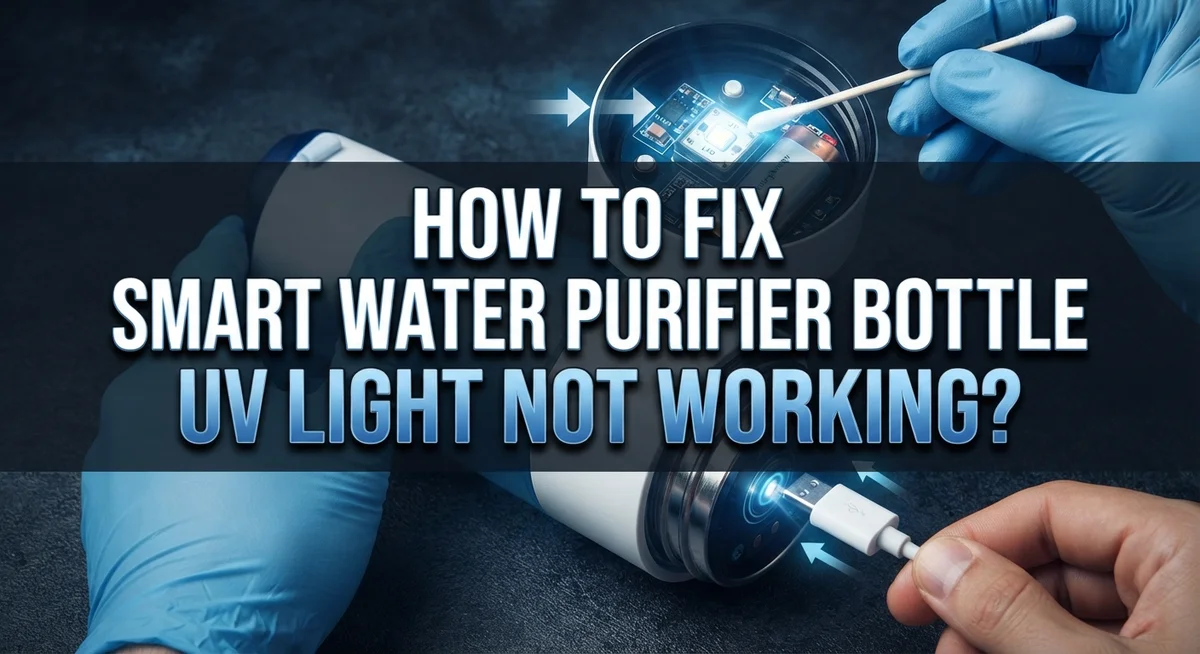
How To Fix Smart Water Purifier Bottle UV Light Not Working?
Your smart water purifier bottle is supposed to keep your water clean and safe. But when the UV light stops working, that protection disappears fast.
This is a frustrating problem, and it happens more often than you might think. The UV light is the core of how these bottles kill bacteria and purify water. Without it, you are basically drinking from a regular bottle with no filtration at all.
The good news? Most UV light failures have simple causes you can fix yourself.
Loose connections, a dirty sensor lens, a drained battery, or an unsecured lid can all stop the UV light from working. Some fixes take less than a minute.
In this guide, we walk you through every common reason your UV light has stopped working. We also cover step-by-step troubleshooting so you can find the exact problem quickly.
In a Nutshell
- Check the power first. A drained battery or loose connection is one of the most common reasons the UV light stops working.
- Make sure the lid is fully secured. Most smart bottles have a safety lock that prevents the UV light from turning on if the lid is loose or removed.
- Clean the UV sensor lens and chamber. Dirt and debris block the sensor, which stops the light from activating properly.
- Inspect the fuse and wiring. A blown fuse or faulty switch can cut power to the UV system entirely.
- Consider the bulb’s age. UV bulbs wear out over time. If your bottle is around a year old, the lamp may need replacing.
- Run a full charge cycle before troubleshooting further. Many UV failures are simply caused by low battery, which is easy to overlook.
How UV Light Works in Smart Water Purifier Bottles
UV light works by emitting ultraviolet radiation that destroys the DNA of bacteria and viruses in your water. When the UV light hits these microorganisms, it damages their genetic material so they cannot reproduce or survive.
Smart water purifier bottles use UV light in automatic self cleaning cycles. Your bottle activates the UV light at set intervals, often every 2 hours for about 10 seconds. This keeps the water inside fresh and safe between uses.
The UV bulb sits inside a special chamber within your bottle. Light from the bulb radiates outward and passes through the water. A sensor lens detects when the bulb is working properly and signals the bottle’s smart system.
Your bottle’s lid plays an important role in UV operation. When you secure the lid completely, it triggers a safety lock that allows the UV system to function. If the lid is loose or removed, the bottle stops the UV light automatically to protect you from direct exposure.
The smart system monitors battery power to run the UV cycles. A fully charged bottle has enough energy to complete multiple cleaning cycles throughout the day. When battery drops too low, the UV light cannot activate even if everything else works fine.
Over time, UV bulbs lose effectiveness. Most bulbs last about one year before they stop producing enough ultraviolet radiation to kill bacteria effectively. Your bottle may still turn on, but the light becomes too weak to purify your water properly.
Understanding how these components work together helps you identify problems quickly. When you know the process, troubleshooting becomes much easier and faster.
Common Reasons Your UV Light Has Stopped Working
Your UV light stops working for several specific reasons. Let’s go through the most common causes so you can identify what’s happening with your bottle.
Power and battery issues are the leading culprit. If your bottle’s battery is completely drained, the UV system won’t activate at all. Check that your charging cable connects properly to the bottle’s charging port. A loose connection prevents the battery from charging fully.
A blown fuse cuts power to the entire UV system instantly. Fuses protect the UV circuit from electrical damage. If the fuse is damaged, no electricity reaches the light bulb. You’ll need to inspect the fuse compartment carefully.
The UV sensor lens gets dirty more easily than you’d expect. Dust, mineral deposits, and water droplets accumulate on the sensor over time. When the lens is blocked, the bottle can’t detect when to activate the UV cycle. This is one of the easiest problems to fix with simple cleaning.
An unsecured lid triggers the safety lock feature. Smart bottles have built in protection that stops the UV light from operating if the lid isn’t fastened properly. Always twist the lid clockwise until it clicks into place.
The UV bulb itself ages and loses power. Most UV bulbs last approximately one year of regular use. As the bulb ages, it produces less ultraviolet radiation and eventually fails completely.
A faulty switch prevents the system from turning on. The switch controls when power flows to the UV light. If the switch is broken or stuck, the light never receives the signal to activate.
Check each of these causes systematically. Start with power and battery, then move to the lid and sensor. This approach helps you locate the exact problem quickly.
How To Diagnose the Problem Before You Start Fixing
Before you start taking apart your smart water purifier bottle, you need to figure out what’s actually wrong. This saves time and prevents unnecessary repairs.
Start by checking if the bottle has power. Press the power button and look for any LED indicators. If nothing lights up, the battery might be completely drained. Plug the bottle in and charge it for at least two hours. Many UV failures are simply caused by low battery.
Next, inspect the lid carefully. Make sure it’s screwed on tightly and fully seated. Most smart bottles have a safety lock that prevents the UV light from turning on if the lid isn’t secure. Remove the lid, then reattach it firmly. Try activating the UV light again.
Look at the UV chamber inside the bottle. Open the bottle and shine a flashlight into the chamber where the UV bulb sits. Check for visible dirt, mineral deposits, or debris. These blockages prevent the sensor from detecting that the light needs to turn on.
Examine the UV sensor lens specifically. This small lens usually sits near the water line inside your bottle. Wipe it gently with a soft, dry cloth. Dirt and mineral buildup on this lens stops the system from working properly.
Check the power connection where the bottle charges. Make sure the charging contacts are clean and making good contact. Look for any corrosion or loose connections.
Finally, listen for sounds when you press the power button. A working system makes a slight humming or clicking noise during the self cleaning cycle. Silence suggests an electrical problem rather than a sensor issue.
Step-by-Step Guide To Fix Your UV Light
Start with the simplest fix first. Check that your bottle is fully charged before assuming the UV light is broken. A low battery prevents the self cleaning cycle from running. Connect your bottle to power and wait for a complete charge cycle to finish.
Next, verify the lid is completely secure. The safety lock stops UV operation if the lid feels loose or misaligned. Remove the lid completely, then screw it back on firmly until you hear or feel it click into place. This single step fixes many UV light issues.
Clean the UV sensor lens carefully. Dust and mineral deposits block the sensor, preventing light activation. Use a soft, dry cloth to wipe the lens area inside the chamber. Do this gently to avoid damaging the sensor. Also wipe the UV chamber walls where the light sits.
Inspect the power connection point where your bottle charges. Look for corrosion, dirt, or bent contacts. Wipe the charging contacts with a clean, dry cloth. Poor connections stop power from reaching the UV system.
Check if the UV bulb needs replacement. If your bottle is over one year old, the bulb may have expired. UV bulbs gradually lose effectiveness and eventually stop working. Consult your bottle’s manual for the correct replacement bulb type.
Listen for a clicking sound when you press the power button. No sound means the switch might be faulty. If you hear clicking but see no light, the bulb itself could be dead.
Try these steps in order. Most UV light problems get resolved through these basic troubleshooting methods. If none work, the UV bulb or internal switch likely needs professional replacement.
How To Clean the UV Chamber and Sensor Lens
Your UV chamber collects dust and mineral deposits over time. This buildup blocks the light from reaching your water effectively. The sensor lens also gets covered with residue that prevents it from detecting the UV system’s status.
Start by unplugging your bottle completely. Safety comes first when working with electrical components. Remove the bottle from its charging dock and set it on a clean, dry surface.
Locate the UV chamber inside your bottle. This is where the UV bulb sits. You’ll see a clear or translucent sleeve surrounding the light. Gently wipe this chamber with a soft, lint free cloth. Use distilled water if you notice stubborn mineral deposits. Never use abrasive materials or harsh chemicals that could damage the chamber walls.
Find the sensor lens next. This small component usually sits near the UV chamber or on the bottle’s interior wall. The lens looks like a small dark circle or window. Wipe it gently with a clean, dry cloth. If debris is stuck on it, dampen the cloth slightly with distilled water. Be very gentle here because the sensor is sensitive.
Let everything air dry completely before reassembling. This prevents water from entering electrical components. Once dry, reattach any removable parts and plug the bottle back into its charger.
Test your UV light by pressing the power button. You should see the light activate or hear a clicking sound. If the light still doesn’t work after cleaning, the bulb itself may need replacement or another component requires attention. A clean chamber and sensor often solve the problem, so this step is worth trying first.
When and How To Replace a Worn-Out UV Bulb
Your UV bulb has a limited lifespan. Most smart water purifier bottles use UV lamps that last approximately one year of regular use. After this period, the bulb loses its ability to kill bacteria effectively, even if it still produces light.
Signs your bulb needs replacement include dimmer light output, longer purification cycles, or the system failing to complete self cleaning routines. Some smart bottles send notifications when the UV lamp reaches the end of its life. Check your app or control panel for these alerts.
Before replacing the bulb, confirm it’s actually worn out. A dim light doesn’t always mean the bulb is dead. Dirty sensor lenses and clogged UV chambers create the same appearance. Clean these areas first using the method described in previous sections.
To replace a worn out bulb, first unplug your bottle completely. Remove the old bulb by gently twisting it counterclockwise. Do not touch the new bulb with bare hands, as skin oils reduce its effectiveness. Insert the new bulb and twist clockwise until snug. Avoid overtightening, which damages the socket.
After installation, reset your system according to your bottle’s manual. This resets the UV cycle counter and ensures proper operation. Plug in your bottle and run a complete purification cycle to verify the new bulb works correctly.
Keep track of replacement dates so you know when the next change is due. Mark your calendar one year from installation. Regular replacement prevents bacterial growth and maintains water safety. Ordering replacement bulbs in advance prevents gaps in your purification schedule.
Common Mistakes To Avoid When Troubleshooting UV Light Issues
When you troubleshoot UV light problems, certain mistakes can make things worse. Avoid rushing through the process. Many people skip steps and miss simple fixes like loose connections or unsecured lids.
Don’t ignore power issues. A loose charging cable or blown fuse stops everything. Check your power connection first before assuming the bulb failed. This takes seconds and saves time.
Never skip the sensor cleaning step. Dirt and mineral buildup on the UV sensor lens blocks light detection. Your bottle thinks the light isn’t working when it’s actually just blocked. Use a soft, dry cloth to gently wipe the sensor area.
Don’t assume your bulb is bad immediately. Many people replace bulbs that still work. Test other components first. If the light turns on but seems dim, then consider replacement. If nothing happens at all, the problem is likely elsewhere.
Avoid using water to clean the UV chamber. Moisture inside electrical components causes damage. Use dry cloths only and let parts air dry completely before reassembling.
Don’t force components apart. If something doesn’t come loose easily, stop. Forcing parts can break connections or damage the chamber permanently.
Skip the guesswork approach. Troubleshoot systematically from simplest to most complex. Start with power, then lid security, then cleaning, then sensor inspection, and finally bulb replacement. This order saves you from unnecessary work.
Don’t forget safety. Always unplug your bottle before cleaning or inspecting internal parts. Never touch the UV bulb directly with bare hands. Oils from your skin can damage it.
How To Maintain Your Smart Bottle To Prevent Future UV Failures
Regular maintenance prevents most UV light failures before they start. Think of your smart bottle like a car that needs oil changes. Small actions now save you from bigger problems later.
Check your power connection every two weeks. Look at where your bottle charges and make sure nothing blocks the contacts. Dust and debris collect there naturally over time. Wipe both the charging port and the bottle’s connector with a dry cloth. This simple step prevents connection failures that disable your UV system.
Clean your UV sensor lens monthly. The sensor tells your bottle when to activate the UV light. When dust covers it, the system thinks something is wrong and shuts down. Use a soft, lint-free cloth and gently wipe the lens area. Never use liquids for this cleaning.
Keep your UV chamber dry and clear. After each use, leave your bottle open for a few minutes so moisture evaporates. Check inside the chamber for mineral buildup from your water. If you see white or cloudy deposits, use a soft brush to remove them gently.
Track your UV bulb’s age. Most bulbs last about one year of regular use. Write the installation date on your bottle or set a phone reminder. Replacing the bulb before it fails prevents emergency situations.
Secure your lid properly every single time. Loose lids trigger safety locks that stop the UV system from working. Make sure you hear a click when you close it.
Store your bottle in a cool, dry place. Heat and humidity damage electronic components. Keep it away from direct sunlight when not in use.
These habits keep your UV light working reliably for years.
Final Thoughts
A UV light failure in your smart water purifier bottle is almost always fixable. Most problems come down to a few simple causes — a loose connection, a dirty sensor lens, an unsecured lid, or a bulb that has reached the end of its life.
The good news is that you don’t need special tools or technical skills to solve most of these issues.
Start with the basics first. Check your power connection, confirm your lid is fully secured, and make sure your bottle has a full charge. These quick checks solve a surprising number of UV failures.
If the basics don’t work, move to cleaning. A dirty UV chamber or sensor lens blocks light output and confuses the system. Regular cleaning prevents this problem entirely.
When cleaning and connection fixes don’t help, consider your bulb’s age. A bulb that is around one year old is likely due for replacement. Swapping it out is straightforward and restores full purification performance.
Prevention is always easier than repair. Monthly sensor cleaning, proper lid habits, and tracking your bulb’s age keep your UV system running without interruption.
Your smart bottle is designed to protect your drinking water every day. Treating it with basic care means it will keep doing that job reliably.
If you have tried every troubleshooting step and your UV light still does not work, contact your bottle’s manufacturer directly. Most brands offer support and warranty options for UV system failures that cannot be resolved at home.
Consistent maintenance and early troubleshooting are the two best habits you can build to keep your smart water purifier bottle performing at its best.
Frequently Asked Questions
Why does my UV light stop working when the lid is loose?
Your smart bottle has a safety lock feature. This lock prevents the UV system from running if the lid is not fully secured. This protects you from accidental exposure. Always twist your lid firmly until you hear a click. The bottle will not activate the UV light until the lid is completely fastened.
Can I clean the UV chamber with water?
No. Water can damage the UV components and create electrical hazards. Instead, use a dry, soft cloth to gently wipe the chamber. Let the bottle air dry completely before reassembling. If you see stubborn residue, use a slightly damp cloth and dry it immediately afterward.
How often should I replace the UV bulb?
Most UV bulbs last about one year with regular use. Check your bottle’s manual for the exact lifespan. After 12 months, the bulb loses effectiveness even if it still produces light. Mark your calendar when you install a new bulb. Many smart bottles send notifications when replacement time arrives.
What should I do if cleaning doesn’t fix the problem?
Start by checking your power connection and ensuring the bottle is fully charged. Next, inspect the UV sensor lens for dirt or debris and clean it gently. If these steps don’t work, your bulb may need replacement. If you’ve replaced the bulb recently and it still doesn’t work, contact the manufacturer’s support team. They can help diagnose deeper electrical issues.

Hi, I’m Siya — the founder and writer behind Craftifyy.com. I’m a tech enthusiast who loves reviewing gadgets, comparing products, and helping people make smarter buying decisions. Got a question? Feel free to reach out!