
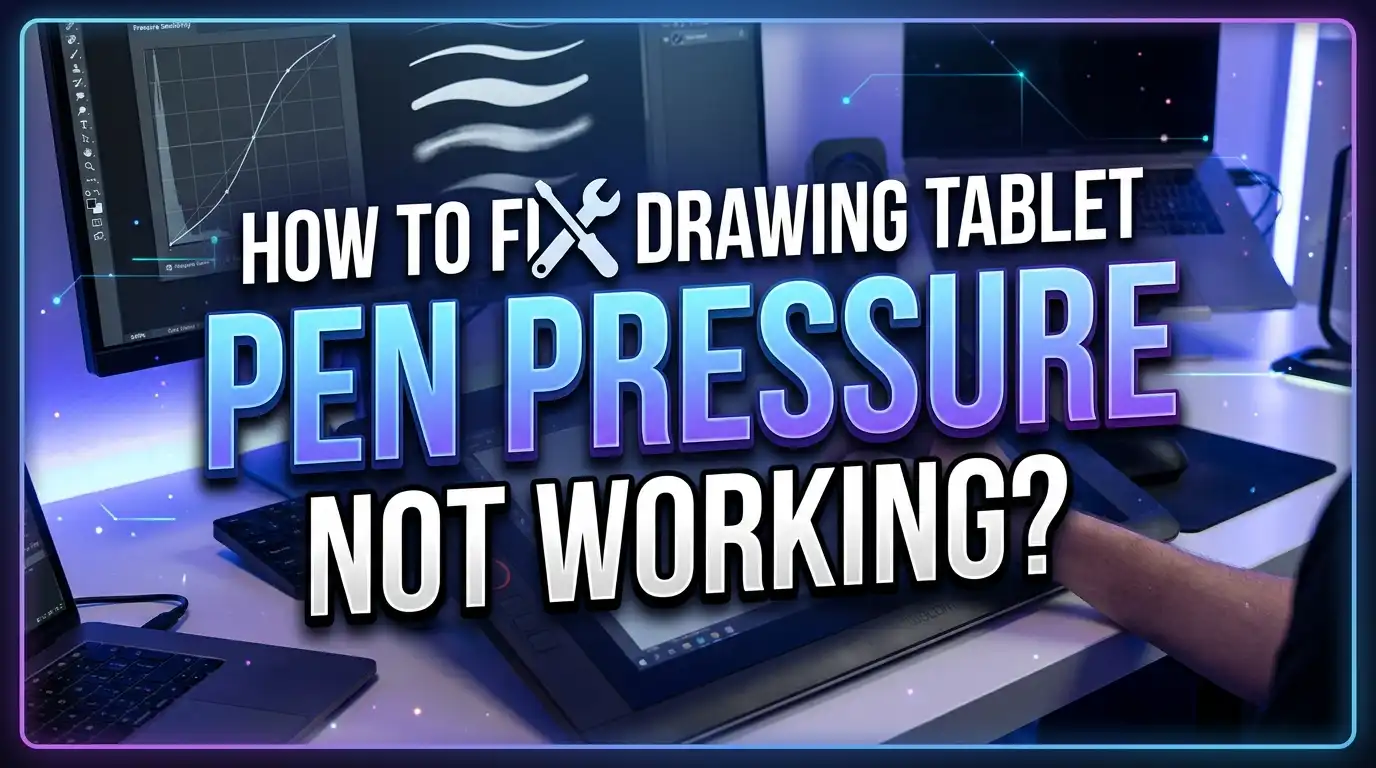
How to Fix Drawing Tablet Pen Pressure Not Working?
You sit down to draw. You open your favorite art software, pick up your pen, and start making strokes. But something feels wrong. Every line looks the same thickness. Light strokes and heavy strokes produce identical marks. Your drawing tablet pen pressure has stopped working.
This is one of the most common and frustrating problems digital artists face. Pen pressure sensitivity is the core feature that makes a drawing tablet feel like a real pencil or brush. Without it, your tablet becomes little more than an expensive mouse. The good news? This problem is almost always fixable. It rarely means your hardware is broken.
The causes range from outdated drivers and incorrect software settings to simple conflicts between your operating system and your tablet. In this guide, you will find clear, practical, step by step solutions that cover every major tablet brand and every popular drawing application.
In a Nutshell
- Driver issues are the most common cause. An outdated, corrupted, or improperly installed tablet driver is responsible for pen pressure failure in the majority of cases. A clean reinstall of your tablet driver fixes this problem more often than any other solution.
- Your drawing software needs pen pressure enabled separately. Most art applications do not automatically use pen pressure. You must turn on pressure sensitivity inside the software’s brush settings. Check for settings like “Shape Dynamics” in Photoshop or “Tablet” preferences in Clip Studio Paint.
- The WinTab vs. Windows Ink conflict causes many failures. Windows computers use two different tablet input systems. If your software and driver disagree on which system to use, pen pressure stops working. Switching between WinTab and Tablet PC mode in your software often fixes the problem instantly.
- A worn out pen nib can kill pressure sensitivity. If your nib is flat, chipped, or too short, it cannot activate the pressure sensor inside the pen properly. Replacing the nib is a quick and cheap fix that many artists overlook.
- Conflicting drivers from multiple tablets destroy pen pressure. If you have ever owned a different tablet brand, old driver files may still exist on your computer. These leftover files conflict with your current tablet and cause pressure failure. Remove all old tablet drivers before installing new ones.
- Operating system updates sometimes break tablet drivers. A recent Windows or macOS update can overwrite tablet settings or introduce compatibility issues. After a major OS update, always reinstall your tablet driver to restore full functionality.
Confirm That Pen Pressure Is Actually Not Working
Before you start changing settings, you should verify the problem. Sometimes pen pressure works fine at the driver level but fails inside a specific application. Other times, it fails everywhere.
Open your tablet driver software first. Wacom users can open Wacom Center or Wacom Tablet Properties. Huion users can open HuionTablet. XP Pen users can open PenTablet. Most driver applications include a pressure test area where you can press your pen and see the pressure values change in real time.
Press your pen lightly on the tablet surface. Then press harder. Watch the pressure bar or pressure value in the driver software. If the values change as you apply more force, your hardware and driver are working correctly. The problem exists inside your drawing application, not in the tablet itself.
If the pressure values do not change, the problem is at the driver or hardware level. This tells you to focus on driver reinstallation or hardware troubleshooting rather than application settings.
You can also test in a simple free application like Krita. Open Krita, select a pressure sensitive brush, and draw several strokes with varying pressure. If pressure works in Krita but not in Photoshop, you know the issue is specific to Photoshop’s settings.
Update or Reinstall Your Tablet Driver
The tablet driver is the software bridge between your pen and your computer. If this bridge is broken, outdated, or corrupted, pen pressure will not work. Reinstalling the driver is the single most effective fix for pressure problems.
Start by completely removing the existing driver. On Windows, open Control Panel, go to Programs and Features, and uninstall any entries related to your tablet brand. Look for names like “Wacom Tablet,” “HuionTablet,” or “PenTablet.” On macOS, check your Applications folder for the tablet driver app and use its built in uninstaller if one exists.
Restart your computer after uninstalling. This step is critical. Many driver files remain active in memory until you reboot. Skipping the restart is a common reason why reinstallation fails.
After restarting, go to your tablet manufacturer’s official website. Download the latest driver version for your specific tablet model and operating system. Install the fresh driver, then restart your computer once more. Connect your tablet and test pen pressure again.
If a standard uninstall does not work, try a manual cleanup. On Windows, search your file system for any remaining folders named after your tablet brand. Common locations include C:\Program Files, C:\Program Files (x86), and C:\Users\YourName\AppData. Delete any leftover folders. Wacom also provides a dedicated cleanup utility on their support website that removes all traces of old drivers.
Remove Conflicting Tablet Drivers
Many digital artists upgrade from one tablet brand to another over time. You might have started with a Huion tablet and later switched to Wacom. Old drivers from your previous tablet can interfere with your current one. This conflict is a frequent and often overlooked cause of pen pressure failure.
Your computer may have residual driver files from a previous tablet installation. These files can intercept pen input signals and prevent your current driver from receiving pressure data correctly.
Check your installed programs list. Open Control Panel on Windows or System Preferences on macOS. Look for any tablet driver software that does not belong to your current tablet. If you find Wacom drivers but use a Huion tablet, uninstall the Wacom drivers completely. The reverse also applies.
On Windows, you should also check for leftover wintab32.dll files. This file is placed in your system directories by tablet drivers. If an old version of this file from a different brand exists, it can override your current driver’s version. Navigate to C:\Windows\System32 and C:\Windows\SysWOW64. Look for wintab32.dll. If you are unsure which driver placed it there, rename it to wintab32.dll.bak before installing your current driver fresh. Your new driver will place the correct version during installation.
After removing all conflicting software, restart your computer and perform a clean install of your current tablet driver.
Switch Between WinTab and Windows Ink
Windows computers support two different systems for handling pen tablet input: WinTab and Windows Ink (also called Tablet PC). WinTab is the older standard. It has existed since the early days of pen tablets and communicates directly with drawing applications. Windows Ink is the newer Microsoft standard that integrates pen input with the operating system.
Different drawing applications prefer different input methods. Photoshop CC and newer versions work best with Windows Ink enabled. Older versions of Photoshop, SAI, and some other applications work better with WinTab. Clip Studio Paint lets you choose between them in its preferences.
If pen pressure is not working, try switching between these two systems. First, open your tablet driver settings. Look for a checkbox or toggle labeled “Windows Ink.” If it is currently enabled, disable it. If it is disabled, enable it. Test your drawing application after each change.
In Clip Studio Paint, go to File, then Preferences (or press Ctrl+K). Select the Tablet tab. You will see options for “WinTab” and “Tablet PC.” Switch to the other option and click OK. Test your pen pressure. This single toggle fixes pen pressure problems in Clip Studio Paint for a large number of users.
In Krita, go to Settings, then Configure Krita, then Tablet Settings. You can switch between WinTab and Windows 8+ Pointer Input. Try the alternative setting and restart Krita.
Enable Pen Pressure in Adobe Photoshop
Photoshop requires specific settings to recognize pen pressure. The application does not use pressure sensitivity by default for all brush tools. You must manually enable it for each brush property you want pressure to control.
Open Photoshop and create a new document. Select the Brush tool from the toolbar. Now open the Brush Settings panel by pressing F5 on your keyboard. You can also find it under Window in the menu bar.
In the Brush Settings panel, click on “Shape Dynamics.” Make sure the checkbox next to Shape Dynamics is checked. Under the Control dropdown menu next to Size Jitter, select “Pen Pressure.” This tells Photoshop to vary the brush size based on how hard you press.
If you see a small triangle with an exclamation mark next to the Pen Pressure option, Photoshop is telling you it cannot detect a pressure sensitive device. This usually means the driver is not installed correctly or Windows Ink is not configured properly.
For Photoshop CC and later, Windows Ink must be enabled in your tablet driver settings. Go to your Wacom, Huion, or XP Pen driver properties. Find the Windows Ink checkbox and make sure it is turned on. Restart Photoshop after making this change.
You can also check your “Transfer” settings in the Brush Settings panel. Transfer controls opacity and flow based on pen pressure. Click on Transfer, check the box, and set the Opacity Jitter control to Pen Pressure if you want pressure to affect transparency.
Enable Pen Pressure in Clip Studio Paint
Clip Studio Paint uses its own tablet input system that you must configure correctly. The most important setting is the tablet service preference, which determines how the software communicates with your pen.
Go to File, then Preferences (shortcut: Ctrl+K on Windows, Cmd+K on macOS). In the Preferences dialog, select the “Tablet” section from the left side menu. You will see a setting called “Using tablet service” with two options: WinTab and Tablet PC.
If your pen pressure is not working, switch to the other option. If WinTab is selected, change it to Tablet PC. If Tablet PC is selected, change it to WinTab. Click OK and test your pen again. This fix resolves pen pressure issues in Clip Studio Paint for the majority of users.
If switching the tablet service does not help, check your pen pressure curve. Go to File, then Pen Pressure Settings (or Adjust Pen Pressure). Clip Studio Paint will display a test area where you can draw strokes. The software will analyze your drawing pressure and create a custom pressure curve. Complete this calibration to make sure the software understands how you naturally press your pen.
Also check individual brush settings. Select a brush tool and open its Sub Tool Detail palette. Look for settings related to “Pen Pressure” under categories like Brush Size, Opacity, and Brush Density. Make sure pen pressure is enabled as the input control for these settings. A small graph icon next to each slider indicates that pressure mapping is active.
Enable Pen Pressure in Krita and Other Free Software
Krita is a popular free drawing application, and pen pressure issues in Krita usually come from its tablet input configuration. Open Krita and go to Settings, then Configure Krita. Select the Tablet Settings section.
Krita offers multiple tablet input APIs. On Windows, you will typically see WinTab and Windows 8+ Pointer Input (Windows Ink). Try switching between them. Many users find that WinTab works better with dedicated drawing tablets, while Windows Ink works better with tablet PCs and Surface devices.
After switching, restart Krita completely. The setting change does not take effect until you close and reopen the application. Test with a pressure sensitive brush like the Basic 5 round brush.
If pen pressure still does not work, check the brush editor. Click on a brush preset and open the Brush Editor (the pencil icon in the brush preset panel). Look for “Size” in the list of brush properties. Click on Size and check if a sensor curve for “Pressure” is connected. The pressure curve should show a diagonal line from bottom left to top right. If it shows a flat line, pressure is not controlling size.
For SAI (Paint Tool SAI), pen pressure issues are almost always related to the wintab32.dll file. SAI uses only WinTab and does not support Windows Ink. Make sure your tablet driver has placed the correct wintab32.dll file in your system directories. Some Huion drivers include a diagnostic tool that checks and repairs this file automatically.
For FireAlpaca and MediBang Paint, check the pen pressure API setting. Go to File, then Environment Settings. Look for an option related to tablet input or pen pressure API. Switch between available options and test the result.
Adjust Your Pen Pressure Curve
Sometimes pen pressure technically works but feels wrong. Your strokes might be too thick with light pressure or require excessive force to produce thin lines. This is a pressure curve issue, not a pressure failure.
Your tablet driver software includes a pressure sensitivity adjustment or pressure curve editor. Open your driver settings and look for a section called Pen, Pen Pressure, or Pressure Sensitivity.
In Wacom driver settings, you will find a slider or curve editor under the Pen tab. The slider ranges from Soft to Firm. Moving it toward Soft makes the pen respond more to light touches. Moving it toward Firm requires more force for the same effect. The curve editor gives you precise control over how input force maps to output pressure levels.
Huion and XP Pen drivers offer similar controls. Look for the Pen Pressure section in your driver application. You will find a pressure curve graph. The default curve is a straight diagonal line. Pulling the curve upward makes light touches register more pressure. Pulling it downward requires heavier pressure for the same output.
Many drawing applications also have their own internal pressure curves. Clip Studio Paint lets you calibrate pen pressure through File, then Pen Pressure Settings. Krita allows curve editing inside each brush preset. Adjusting both the driver curve and the application curve gives you the most control over how your pen feels.
Start with the driver curve at default (a straight diagonal line) and adjust the application curve first. This way, you have a consistent baseline across all your software.
Check and Replace Your Pen Nib
A physical cause that many artists overlook is a worn out pen nib. Drawing tablet pen nibs are consumable parts that wear down over time. As you draw, the nib gradually becomes shorter and flatter. A severely worn nib cannot activate the pressure sensor inside the pen barrel properly.
Remove the nib from your pen and inspect it. Most tablet pens allow you to pull the nib straight out with a nib removal tool, a pair of tweezers, or the nib removal ring that comes with many tablets. Hold the nib up and look at its tip. A fresh nib has a smooth, rounded, or pointed tip. A worn nib looks flat, chipped, or uneven.
If your nib is shorter than half its original length or has a visibly flat tip, replace it immediately. Every drawing tablet comes with spare nibs. Insert a fresh nib by pushing it gently into the pen barrel until it clicks into place.
Also check if the nib is loose or wobbly in the pen barrel. A nib that does not sit firmly can cause intermittent pressure detection. Push it in firmly. If it still wobbles, try a different replacement nib.
Some artists use textured screen protectors or rough tablet surfaces that accelerate nib wear. If you notice your nibs wearing down quickly, consider switching to a smoother surface cover or using nibs made from harder materials. Some manufacturers offer felt nibs, ceramic nibs, or hard plastic nibs with different wear characteristics.
Run the Tablet Diagnostic Tools
Most tablet manufacturers include built in diagnostic tools in their driver software. These tools help you identify whether the problem is with hardware, the driver, or your software settings.
Wacom Center includes a device diagnostics feature. Open Wacom Center, select your tablet, and look for a diagnostics option. Hover your pen over the tablet and watch the pressure reading. Press down lightly, then firmly. You should see the pressure value change smoothly from 0% to 100%. If the values jump erratically, the pen or tablet sensor may have a hardware problem. If the values do not change at all, the driver is not receiving pressure data.
Huion’s driver includes a “Software Diagnosis” tool. Open HuionTablet, click on Software Diagnosis, and check the Wintab32 version. The correct version should show 9.00.00.01 for proper compatibility with most drawing software. If it shows a different version, click “Repair” to replace the Wintab file with the correct version. This repair function fixes pen pressure issues in SAI and older versions of Photoshop.
XP Pen’s driver has a pen test area in the main settings window. Open the driver, navigate to the Pen section, and use the test area to verify pressure response. Draw a few strokes in the test area and check if line thickness varies with pressure.
If the diagnostic tools confirm that hardware and drivers are working, the problem is in your application settings. Focus on the software specific fixes described in earlier sections of this guide.
Check for Operating System Conflicts
Operating system updates can interfere with tablet drivers. Both Windows Update and macOS updates have a history of breaking tablet driver functionality. After a major update, your tablet driver may stop working or lose specific features like pressure sensitivity.
On Windows, check if a recent update occurred. Go to Settings, then Update & Security, then View Update History. If a Windows update was installed around the time pen pressure stopped working, the update may have overwritten driver files or changed system settings. Reinstall your tablet driver after the update to restore proper function.
Windows also has a built in “Tablet PC” feature that can conflict with dedicated drawing tablets. Open Settings and search for “Pen & Windows Ink.” Review the settings here. Some users find that disabling specific handwriting or gesture features restores pen pressure in their drawing software.
On macOS, check System Preferences (or System Settings on newer versions) for Security & Privacy. macOS requires you to grant accessibility permissions and input monitoring permissions to tablet drivers. If these permissions were revoked during an update, your driver cannot read pen pressure. Go to Security & Privacy, then Privacy, then Accessibility. Make sure your tablet driver app is listed and checked. Also check Input Monitoring for the same permissions.
If you use a Mac with Apple Silicon (M1, M2, M3, or M4 chips), confirm that your tablet driver supports ARM architecture natively. Running an Intel driver through Rosetta 2 can sometimes cause pressure sensitivity issues.
Check USB Connection and Power Issues
Pen pressure problems can sometimes come from a weak or unstable USB connection. Your tablet communicates pressure data through its USB cable or wireless receiver. If this connection is unreliable, pressure data may be lost or corrupted.
Try a different USB port on your computer. Avoid using USB hubs or extension cables, which can reduce signal quality. Plug the tablet cable directly into a USB port on the computer itself. If your tablet uses a USB C connection, make sure the cable supports data transfer and is not a charge only cable.
Inspect the USB cable for damage. Look for kinks, frayed sections, or bent connectors. A damaged cable can transmit basic pen position data but fail to carry pressure information reliably. If you have a spare USB cable that fits your tablet, try using it instead.
For wireless tablets or tablets using Bluetooth, signal interference can cause pressure data loss. Move other wireless devices like phones, wireless mice, and Bluetooth speakers away from your tablet. Try switching to a wired connection temporarily to rule out wireless interference.
If you use a pen display (a tablet with a built in screen), check all cable connections. Pen displays often use multiple cables or a special breakout cable with USB, HDMI, and power connectors. All connections must be secure for full pen functionality. A loose USB connection can cause the display to work as a screen but lose pen pressure capability.
Reset Your Tablet and Drawing Software to Default Settings
If nothing else has worked, a complete settings reset can clear any configuration errors. Both your tablet driver and your drawing software store settings that may have become corrupted or misconfigured.
In your tablet driver, look for a “Reset to Default” or “Restore Defaults” option. Wacom Center allows you to back up and reset settings from the gear icon or settings menu. Huion and XP Pen drivers typically have a reset button in the general settings area. Resetting the driver clears all custom pressure curves, button mappings, and display configurations. You will need to set these up again after the reset.
In Photoshop, you can reset preferences by holding Ctrl+Alt+Shift (Windows) or Cmd+Option+Shift (macOS) while launching the application. A dialog box will ask if you want to delete the settings file. Click Yes. Photoshop will launch with factory default settings. You will need to reconfigure your workspace, but this often fixes persistent pen pressure issues.
In Clip Studio Paint, go to the installation folder and look for the user settings directory. You can reset preferences by deleting the settings files, or you can simply uninstall and reinstall the application.
In Krita, you can reset settings by renaming or deleting the Krita configuration folder. On Windows, this is located at C:\Users\YourName\AppData\Roaming\krita. Rename the “krita” folder to “krita_backup” and launch Krita. The application will create fresh settings.
After resetting, test pen pressure with a basic brush before restoring any custom settings.
Contact Support or Consider Hardware Replacement
If you have tried every software fix and pen pressure still does not work, you may have a hardware problem. Pen pressure sensors can fail due to drops, liquid damage, or manufacturing defects.
Test your pen on a different tablet if possible. Borrow a friend’s compatible tablet or visit a store that has demo units. If your pen works on another tablet, your tablet’s sensor board may be damaged. If your pen fails on every tablet, the pen itself is the problem.
Most tablet manufacturers offer warranty support for pressure sensor failures. Check your warranty status on the manufacturer’s website. Wacom, Huion, and XP Pen all provide warranty periods that typically range from one to two years.
If your tablet is out of warranty, replacement pens are available from all major manufacturers. A new pen is much cheaper than a new tablet and often solves pressure issues that resist all software fixes. Make sure you purchase a pen that is specifically compatible with your tablet model, as pens are not interchangeable between different product lines.
Before purchasing a new pen, try one more full diagnostic cycle. Uninstall all tablet drivers. Restart your computer. Remove any leftover driver files manually. Install the latest driver from your manufacturer’s website. Restart again. Test in the driver’s built in pressure test area. This final clean install attempt catches many problems that partial fixes miss.
Frequently Asked Questions
Why does pen pressure work in one application but not another?
Each drawing application has its own pen pressure settings. An application may need you to enable pressure sensitivity manually in its brush or preferences settings. The application may also use a different tablet input method than what your driver provides. For example, Photoshop prefers Windows Ink while SAI uses WinTab. Check each application’s tablet preferences and brush settings individually.
Can a Windows update break my tablet pen pressure?
Yes. Windows updates can overwrite tablet driver files, reset system settings, or introduce compatibility changes that break pen pressure. If your pen pressure stopped working after a Windows update, reinstall your tablet driver. Download the latest version from your tablet manufacturer’s website and perform a clean installation.
How often should I replace my pen nib?
This depends on how much you draw and what surface texture you use. Heavy daily use on a textured surface may wear a nib down in a few weeks. Light or occasional use on a smooth surface can make a nib last several months. Check your nib regularly. Replace it when the tip looks flat, uneven, or noticeably shorter than a fresh nib.
Do I need to enable Windows Ink for pen pressure?
It depends on your software. Adobe Photoshop CC and newer versions require Windows Ink. Paint Tool SAI works only with WinTab and does not use Windows Ink. Clip Studio Paint supports both and lets you choose in its preferences. Check your specific application’s documentation to determine which input method it requires.
Why does my pen pressure feel too sensitive or not sensitive enough?
Your pressure curve settings control how physical force translates to digital pressure. If your strokes feel too thick with light touches, your curve is set too soft. If you have to press very hard, your curve is set too firm. Adjust the pressure curve in your tablet driver settings and in your drawing application until the pen response matches your natural drawing style.
Can I use two different tablet brands on the same computer?
It is possible but often causes problems. Having two different tablet drivers installed at the same time can create conflicts, especially with the wintab32.dll file. If you must use two tablets, install only one driver at a time and switch as needed. Alternatively, check if both manufacturers support running their drivers side by side without conflict.
Hi, I’m Siya — the founder and writer behind Craftifyy.com. I’m a tech enthusiast who loves reviewing gadgets, comparing products, and helping people make smarter buying decisions. Got a question? Feel free to reach out!