
How To Identify Frequency Interference On 6GHz Wireless Channels?
If your WiFi 6E or WiFi 7 connection keeps dropping speeds you never expected, you are not alone. The 6GHz band promised a cleaner, faster wireless experience, but frequency interference can still make it unpredictable.
Many users assume the 6GHz band is completely immune to the congestion problems that plague 2.4GHz and 5GHz networks. That assumption is wrong, and it can cost you hours of wasted troubleshooting time.
This guide walks you through every step of identifying frequency interference on 6GHz wireless channels. You will learn what causes it, how to spot the warning signs, what tools to use, and how to fix every type of interference you encounter.
Key Takeaways
- The 6GHz band offers up to 59 non-overlapping channels in the US, giving significantly more room than 2.4GHz or 5GHz, but interference can still occur from co-channel congestion, adjacent channel overlap, and incumbent licensed users sharing the spectrum.
- Two main operation modes exist on 6GHz networks: Low Power Indoor (LPI) devices can operate freely without checking a database, while Standard Power devices must use Automated Frequency Coordination (AFC) to avoid interfering with licensed incumbents such as fixed satellite and microwave backhaul services.
- The most common symptoms of 6GHz interference include: unexplained speed drops even with strong signal, intermittent disconnections, high latency spikes, poor throughput despite low device counts, and devices refusing to maintain a 6GHz connection.
- A spectrum analyzer is the single most important tool for diagnosing 6GHz interference. It lets you see RF energy patterns that no standard WiFi scanning app can reveal, including non-WiFi interference sources from radar, fixed satellite services, or rogue transmitters.
- Preferred Scanning Channels (PSCs) play a key role in 6GHz network discovery and interference management. Proper PSC planning reduces scanning overhead and keeps your devices connecting to the correct access point faster and more reliably.
- Systematic troubleshooting wins every time. Moving step by step from symptom identification to spectrum scanning to channel planning to power adjustment gives you a clear path to a clean 6GHz wireless environment.
What Makes the 6GHz Band Different From Other WiFi Frequencies
Before you can identify interference on 6GHz channels, you need to understand what makes this band unique. The 6GHz band, used by WiFi 6E and WiFi 7 devices, spans from 5.925 GHz to 7.125 GHz, giving it 1,200 MHz of spectrum. In the United States, this translates to 59 non-overlapping 20MHz channels, or 7 non-overlapping 160MHz channels. That is a massive amount of space compared to the 3 usable non-overlapping channels on 2.4GHz.
The key difference that makes the 6GHz band cleaner is that legacy devices cannot use it. Only WiFi 6E and WiFi 7 devices can operate in this band. This immediately removes a major source of congestion that plagues older bands. There are no microwaves, baby monitors, or Bluetooth devices creating wideband interference here.
However, the 6GHz band is not a free-for-all. Licensed incumbent users already occupy parts of this spectrum. Fixed satellite service operators, fixed microwave backhaul links, and broadcast auxiliary services have operating licenses in the 6GHz band. This means WiFi devices operating at higher power levels must coordinate their transmissions to avoid disrupting these licensed users.
The 6GHz band also uses much higher frequencies than 2.4GHz. Higher frequency signals attenuate faster through walls, floors, and other materials. A signal that reaches 50 feet on 2.4GHz may only reach 25 feet with the same power on 6GHz. This shorter range can actually reduce interference from distant sources, but it also means you need careful access point placement to get reliable coverage.
Three power classes define how 6GHz devices operate: Very Low Power (VLP) for mobile and portable use, Low Power Indoor (LPI) for fixed indoor access points, and Standard Power (SP) for higher-power deployments that use AFC coordination. Each class has different interference implications, which this guide covers in detail later.
Common Sources of Interference on 6GHz Channels
Even though the 6GHz band has fewer legacy device conflicts, several interference sources can still degrade your network. Knowing what these sources are is the first step toward finding and fixing them.
The most significant source of interference on 6GHz is co-channel interference (CCI), which happens when multiple access points or neighboring networks use the same channel at the same time. Because 6GHz devices use OFDMA (Orthogonal Frequency Division Multiple Access), co-channel interference is handled more gracefully than on older standards, but it still causes performance degradation in dense deployments where many access points operate nearby.
Adjacent channel interference (ACI) is actually more damaging than co-channel interference. This happens when two access points use channels that partially overlap in frequency. On the 6GHz band with wide channel widths like 80MHz or 160MHz, poor channel planning can cause adjacent channels to bleed into each other. Unlike co-channel devices that coordinate transmission politely, adjacent channel signals corrupt each other’s data, forcing constant retransmissions.
Licensed incumbent services represent a unique interference concern on the 6GHz band. Fixed satellite earth stations and point-to-point microwave backhaul systems have priority in this spectrum. If a Standard Power WiFi access point transmits on a frequency that conflicts with a licensed microwave link, it can disrupt the microwave link, and the microwave link can overwhelm the WiFi signal in return. This type of interference is particularly hard to diagnose without proper tools.
Rogue access points and neighboring networks can also create unexpected interference, especially in apartment buildings, office complexes, and shopping centers where multiple independent networks occupy the same spectrum. Even though 6GHz has many channels, if neighboring networks cluster on the same popular channels, interference builds quickly.
Recognizing the Symptoms of 6GHz Interference
You cannot fix what you cannot identify. Learning to read the symptoms of 6GHz interference saves you hours of guesswork. The symptoms follow predictable patterns depending on what type of interference you are dealing with.
Unexplained throughput drops are the most common symptom. Your device shows a strong signal and excellent signal quality in the WiFi settings panel, but actual download and upload speeds fall far below what the connection should deliver. This symptom almost always points to either co-channel interference from a nearby network or a non-WiFi signal polluting the channel.
Intermittent disconnections that happen without any apparent reason often indicate adjacent channel interference or a competing signal that periodically overwhelms your access point. The connection drops, reconnects within a few seconds, then drops again. Users often blame the router, but the real cause is RF interference that causes the signal to be misread.
High latency spikes on a 6GHz connection, especially when measured with a continuous ping test, suggest that your access point is waiting longer than usual to find a clear transmission window. This is a classic sign of a crowded channel where multiple devices are competing for airtime.
Devices refusing to stay on 6GHz and falling back to 5GHz or 2.4GHz is another strong indicator. Modern devices with band steering will automatically fall back to a more reliable band when the 6GHz connection becomes unstable. If your device keeps migrating away from 6GHz, the band is likely experiencing interference that makes it less reliable than the fallback options.
Poor performance in specific locations within a building, while other areas on the same network perform well, can indicate a localized interference source such as a rogue transmitter, a neighboring access point using overlapping channels, or physical multipath reflection creating dead zones.
Step 1: Run a Basic WiFi Scan to Find Neighboring Networks
Your first diagnostic step requires no special tools. A basic WiFi scan gives you a snapshot of every network broadcasting near your location and the channels they are using. This scan is your starting point for understanding the channel environment.
On a Windows computer, open the command prompt and type netsh wlan show networks mode=bssid. This command lists every visible network, its BSSID, signal strength, and the channel it uses. On a Mac, hold the Option key and click the WiFi icon in the menu bar, then select “Open Wireless Diagnostics” and use the Scan tab to see channel information for all nearby networks.
For mobile devices, free apps like WiFi Analyzer (Android) can display nearby 6GHz networks and their channel assignments. However, note that not all WiFi scanning apps support the 6GHz band yet, so verify your app has 6GHz support before relying on its output.
When you review your scan results, look for the following patterns. Multiple networks on the same channel as yours indicates potential co-channel interference. Networks on channels adjacent to yours with strong signal strength indicates potential adjacent channel interference. A large number of networks visible at high signal strength indicates a dense RF environment that needs careful channel planning.
Write down every network you see, its channel, its signal strength, and its channel width if available. This list becomes your reference document as you move through the troubleshooting process. A well-documented scan result is worth hours of guesswork later in the process.
Step 2: Use a Spectrum Analyzer to See Non-WiFi Interference
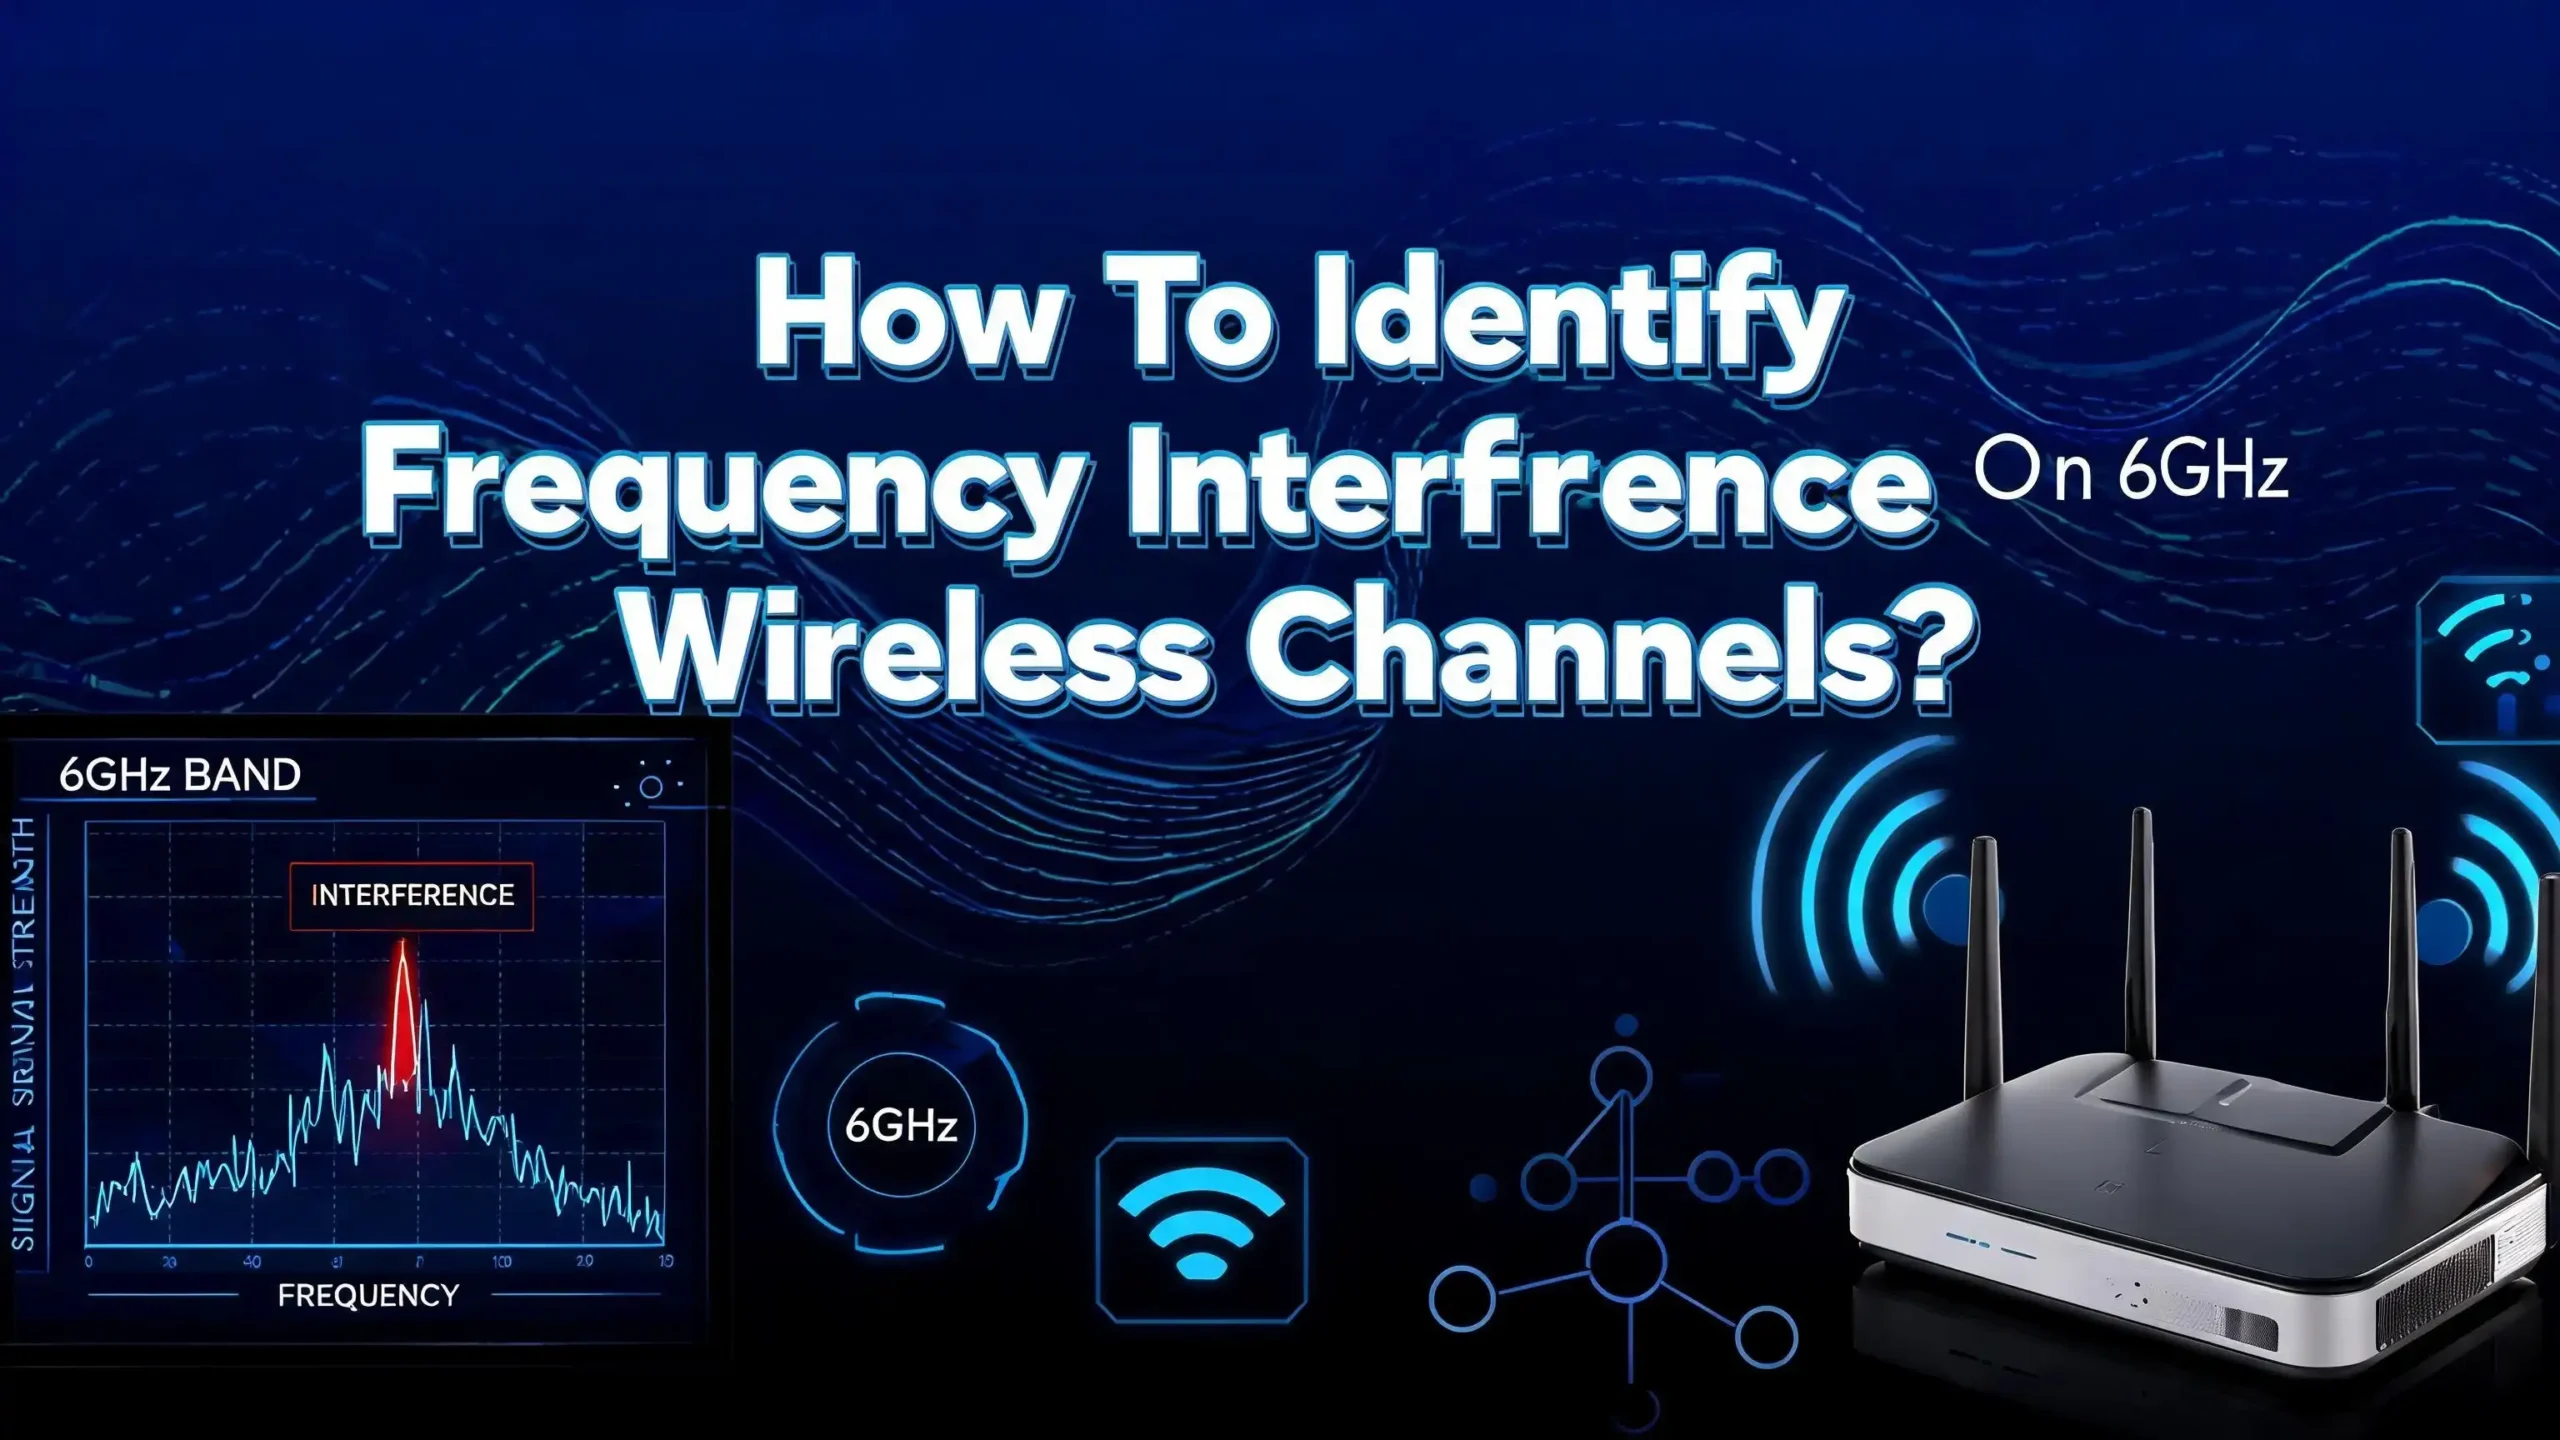
A WiFi scan only shows you WiFi networks. It cannot see the non-WiFi signals that could be disrupting your 6GHz channel. A spectrum analyzer is the tool you need to see the complete RF picture. It displays all RF energy across a frequency range, showing you both WiFi and non-WiFi sources as visual patterns on a frequency-versus-power graph.
To perform a spectrum analysis on the 6GHz band, you need a spectrum analyzer that supports the 6GHz frequency range. Standard consumer-grade spectrum analyzers often only cover up to 2.7GHz or 6GHz, so verify the specifications before purchasing or borrowing equipment. Professional tools such as the Ekahau Sidekick 2, the NetAlly AirCheck G3 PRO, and similar enterprise-grade handheld analyzers support full 6GHz spectrum analysis.
How to use a spectrum analyzer for 6GHz interference detection:
- Set the frequency span to cover 5.925 GHz to 7.125 GHz, which is the complete 6GHz WiFi band.
- Set a reference level that shows the noise floor clearly, typically around -100 dBm for most environments.
- Let the analyzer run for at least 2 to 5 minutes to capture any intermittent signals that appear and disappear.
- Look for persistent energy peaks on channels you are using or adjacent to your channels.
- Look for wideband energy that covers a broad frequency range, which can indicate a sweep jammer, a signal generator, or a malfunctioning transmitter.
- Look for narrowband spikes that appear and disappear at regular intervals, which can indicate radar or point-to-point microwave link transmissions.
The spectrum display gives you a visual fingerprint of every RF source in your environment. Compare what you see against known interference pattern libraries. A steady narrowband spike is likely a licensed microwave backhaul link. A wide energy hump that appears and disappears suggests a pulsed transmitter like radar. A flat energy rise across multiple channels suggests a continuous wideband interferer.
Step 3: Check Your Channel Width Settings for Overlap
Channel width is one of the most overlooked causes of 6GHz interference, especially in environments with multiple access points. Wider channels carry more data per transmission but take up more spectrum, increasing the chance of overlap with neighboring networks.
The 6GHz band supports channel widths of 20MHz, 40MHz, 80MHz, 160MHz, and 320MHz (with WiFi 7). Choosing a 160MHz wide channel on 6GHz is equivalent to occupying 8 adjacent 20MHz channels simultaneously. If a neighboring network also uses a 160MHz channel in the same area of the spectrum, the two channels will overlap even if their center frequencies are several channels apart.
Here is a practical approach to checking your channel width settings:
First, log into your access point’s administration interface and find the 6GHz radio settings. Note the current channel number and channel width. Then calculate the frequency range your channel occupies. A 160MHz channel centered on channel 63 (6.315 GHz) occupies from approximately 6.235 GHz to 6.395 GHz.
Second, compare your channel’s frequency range against the channels used by your neighbors from the WiFi scan you performed earlier. If any neighboring network’s channel overlaps with yours in frequency, you have adjacent channel interference.
General channel width recommendations for the 6GHz band:
- In home environments with a single access point, 80MHz or 160MHz channels are reasonable because there is less competition for spectrum.
- In medium-density business environments with 3 to 10 access points, 80MHz channels offer a good balance between speed and spectrum efficiency.
- In high-density environments like offices or public spaces, 40MHz or even 20MHz channels give you more non-overlapping options and reduce interference between your own access points.
- Always avoid using different channel widths on neighboring access points that cover the same area, as this creates partially overlapping channel boundaries that are very hard to manage.
Step 4: Understand How AFC Works and Why It Matters for Interference
If your 6GHz access point operates in Standard Power mode, it must use Automated Frequency Coordination (AFC) to prevent interference with licensed incumbent users. Understanding AFC is essential for diagnosing interference problems in Standard Power 6GHz deployments.
AFC is a database-driven system coordinated by regulatory authorities like the FCC in the United States. When a Standard Power 6GHz device turns on, it contacts an AFC server over the internet and reports its GPS location and antenna characteristics. The AFC server checks the reported location against a database of all licensed incumbent users operating nearby. It then returns a list of approved channels and maximum power levels the device is allowed to use at that location.
If your AFC query fails or returns restricted channels, your access point will fall back to lower power settings or may be unable to use certain channel ranges at all. This can cause unexpected performance degradation that looks identical to interference but is actually a regulatory power restriction.
To check if AFC is causing your 6GHz performance issues, review your access point’s system logs for AFC query results. A failed AFC query, a timeout, or a response that restricts many channels is a clear indication that the performance issue is regulatory rather than physical interference.
In environments where AFC is restricting your channel options, the practical fix is to verify that your access point has accurate GPS coordinates entered, that it has a reliable internet connection for AFC queries, and that the AFC server your device is configured to use is operational. Some enterprise access point vendors allow you to specify a backup AFC server for redundancy.
Step 5: Identify Co-Channel Interference From Neighboring Networks
Co-channel interference on the 6GHz band is less destructive than adjacent channel interference, but it still significantly reduces throughput in dense environments. Devices on the same channel coordinate their transmissions using CSMA/CA or OFDMA resource scheduling, but more competing devices still mean less airtime for each one.
To identify co-channel interference, go back to your WiFi scan results and count how many networks share the same channel as your access point. If three or more networks with signal strength above -75 dBm are all using channel 37, for example, every device on all those networks is competing for the same airtime window.
The practical test for co-channel interference is simple. Connect a device to your 6GHz network and run a continuous throughput test using a tool like iPerf3 or a browser-based speed test. Note the average throughput. Then, during a time when neighboring networks have lower activity, such as early morning on a weekend, run the same test again. If throughput improves significantly during low-activity periods, co-channel interference is the primary cause of your performance problems.
Co-channel interference is solved by changing your channel assignment to a less occupied channel. Use your WiFi scan data to identify channels where no neighboring networks are present or where neighboring networks have very low signal strength below -85 dBm. On the 6GHz band, you have up to 59 channels available in the US, so finding a clear channel is usually possible even in dense urban environments.
Step 6: Test for Adjacent Channel Interference
Adjacent channel interference causes more serious performance problems than co-channel interference because it leads to data corruption and constant retransmissions rather than just slower airtime sharing. The key difference is that co-channel devices hear each other and take turns, while adjacent channel devices cannot properly detect each other and transmit simultaneously, corrupting both signals.
To test for adjacent channel interference, look at your WiFi scan results for networks using channels that are within one or two channel-widths of your channel. For example, if your access point uses channel 37 with 80MHz width, networks using channels 21 or 53 with 80MHz width may overlap with your channel depending on their exact frequency boundaries.
The symptom that separates adjacent channel interference from co-channel interference is packet error rate. On a co-channel network, throughput drops but connections stay stable. On an adjacent channel interference scenario, you will see high packet loss percentages, frequent retransmissions in packet capture analysis, and connections that drop more frequently.
Run a packet capture on your 6GHz network using a capture tool that supports the 6GHz band. Look at the retry rate, which is the percentage of frames that are retransmitted because the first attempt was corrupted. A retry rate above 10% on a lightly loaded network strongly suggests adjacent channel interference. A retry rate above 25% indicates severe adjacent channel overlap.
The fix is to change your channel assignment so that your channel does not overlap with any strong neighboring network in frequency. On 6GHz, this usually means choosing a channel whose center frequency is separated from all neighboring networks by at least the sum of their respective half-channel widths.
Step 7: Use Preferred Scanning Channels (PSC) to Improve Detection
Preferred Scanning Channels (PSCs) are a group of 15 predefined 20MHz channels within the 6GHz band that devices use as priority scan targets when searching for networks. The PSC channels in the US are: 5, 21, 37, 53, 69, 85, 101, 117, 133, 149, 165, 181, 197, 213, and 229. Understanding PSCs helps you both configure your network for optimal device discovery and diagnose interference problems related to discovery failures.
When a WiFi 6E or WiFi 7 device searches for a 6GHz network, it first scans only the PSC channels rather than all 59 available channels. This reduces the time and power needed to discover networks. If your access point is not configured on or near a PSC channel, devices may take significantly longer to discover your network, which can look like a connection problem even when no actual interference exists.
PSCs also matter for interference identification because neighboring networks that do not follow PSC recommendations can create unexpected channel conflicts. If a poorly configured neighboring access point uses a non-PSC channel that partially overlaps with your PSC channel at a wide channel width, the interference can appear and disappear depending on whether the neighboring network is actively transmitting.
To check your PSC alignment, verify that your access point’s primary channel is one of the 15 PSC channels listed above. If you use 80MHz wide channels, your channel plan should align with PSC boundaries. For example, an 80MHz channel that uses PSC channel 37 as its primary channel will occupy channels 29, 33, 37, and 41 in 20MHz segments, placing the primary discovery channel in the center of the operating band.
Proper PSC alignment is not just a performance optimization. It is also a diagnostic tool. If your devices struggle to connect to 6GHz despite clear spectrum, checking PSC alignment is often the fastest path to the solution.
Step 8: Check for Physical Layer Issues That Mimic Interference
Not every performance problem on 6GHz is caused by RF interference from other transmitters. Physical layer issues can create symptoms that look exactly like interference but have completely different causes and solutions.
The 6GHz band uses higher frequencies than 2.4GHz and 5GHz, which means signals attenuate more quickly through physical obstacles. A wall that barely affects a 5GHz signal can significantly degrade a 6GHz signal. Dense materials like concrete, brick, metal studs in walls, and reinforced concrete floors are particularly effective at blocking 6GHz signals.
To distinguish physical layer issues from RF interference, follow these steps:
Move your test device to within direct line of sight of the access point, preferably within 10 feet with no obstacles between them. Run a throughput test. If throughput returns to expected levels at close range with direct line of sight, the problem is physical propagation rather than RF interference from external sources.
Multipath interference is another physical layer issue that affects 6GHz networks. When a signal reflects off walls, metal surfaces, or large furniture before reaching a device, the reflected copies of the signal arrive slightly after the direct signal. These delayed copies can interfere with the main signal. On 6GHz, multipath effects are generally less severe than on lower frequencies because the shorter wavelength reflects differently, but in environments with many large metal surfaces, multipath can still cause noticeable performance degradation.
If you identify physical layer issues as the primary problem, the solutions include repositioning access points, adding additional access points to reduce coverage distances, adjusting antenna orientation, or using higher-gain antennas to overcome physical attenuation. These are installation fixes rather than channel or frequency fixes.
Step 9: Monitor Signal-to-Noise Ratio (SNR) and RSSI Over Time
Signal-to-Noise Ratio (SNR) and Received Signal Strength Indicator (RSSI) are two metrics that tell you a great deal about interference conditions on your 6GHz channel. Tracking these values over time, rather than just reading them at a single moment, reveals patterns that point directly to interference sources.
RSSI measures the strength of the received signal in dBm. A good 6GHz RSSI for a connected client device typically falls between -40 dBm and -70 dBm. Below -75 dBm, performance begins to degrade. Below -85 dBm, the connection becomes unreliable. However, RSSI alone does not tell you about interference. A device can show -55 dBm RSSI and still have terrible throughput if noise levels are also high.
SNR is the difference between the signal strength and the noise floor, measured in dB. A higher SNR means the signal stands clearly above the background noise, allowing the receiver to decode it accurately. For reliable 6GHz performance, you want SNR above 25 dB for basic connectivity and above 40 dB for high-throughput applications like 4K video streaming or large file transfers.
To monitor SNR over time, use your access point’s built-in reporting tools if available, or use a client-side monitoring tool that logs WiFi metrics continuously. Schedule these monitoring sessions to capture different times of day, including peak usage hours and low usage hours. If SNR drops sharply at specific times and then recovers, this time-based pattern is a strong indicator of a scheduled interference source such as a radar sweep, a microwave link with variable traffic, or neighboring network peak usage.
Record your SNR baseline during a confirmed clean period, such as very early morning when minimal devices are active. Use this baseline to calculate how much the noise floor rises during interference events, which gives you a quantitative measure of interference severity.
Step 10: Analyze Packet Captures to Diagnose Deep Interference
When spectrum analysis and WiFi scanning give you incomplete information, a packet capture provides the deepest level of interference diagnosis available without specialized RF test equipment. A packet capture lets you see exactly what the WiFi protocol is doing in response to interference conditions, even when the interference source itself is not visible to standard tools.
To capture packets on a 6GHz network, you need a wireless adapter that supports 6GHz packet capture mode and software such as Wireshark. Not all WiFi adapters support 6GHz capture mode, so verify hardware compatibility before attempting this step.
Key metrics to analyze in a 6GHz packet capture:
Retry rate tells you how often frames are being retransmitted. As mentioned earlier, a retry rate above 10% on a lightly loaded network indicates significant interference or channel problems.
MCS (Modulation and Coding Scheme) index shows you what data rate the access point and client are negotiating. If the MCS index is much lower than expected for the signal strength you are seeing, the access point is deliberately reducing its modulation complexity to improve reliability in noisy conditions. This is a clear sign that interference is present even when signal strength looks acceptable.
CCA (Clear Channel Assessment) failure rate indicates how often a device wanted to transmit but found the channel busy. High CCA failure rates suggest heavy channel loading from either co-channel interference or legitimate network traffic.
Duration fields in RTS/CTS frames can reveal whether the access point is using an unusually long virtual carrier sense reservation, which can indicate it is dealing with interference from sources it can partially detect but not fully receive.
Analyzing these metrics together gives you a complete picture of what the WiFi protocol is experiencing due to interference, even when the interference source itself cannot be directly captured.
Step 11: Implement Channel Planning to Eliminate Interference
After you have identified the type and source of interference through the steps above, systematic channel planning is the most effective long-term fix. Good channel planning eliminates interference by ensuring that no two access points in the same RF coverage area use overlapping channels.
For a single access point in a home or small office:
Check your WiFi scan results and choose a 6GHz channel that no neighboring network uses. On the 6GHz band in the US, you have 59 channels available in 20MHz increments, so finding an unoccupied channel is usually straightforward. Align your choice with a PSC channel for best device compatibility.
For multi-access-point deployments in a business environment:
Draw a floor plan and mark where each access point is located. For each pair of access points that can hear each other above -85 dBm, assign them different channels with no frequency overlap. In the US, you can fit 7 non-overlapping 160MHz channels in the 6GHz band, which is usually enough for even complex enterprise deployments.
Use a channel plan document to record every access point’s channel assignment. When interference problems arise in the future, you can quickly check whether a new neighboring network has started using a conflicting channel and adjust accordingly.
For high-density deployments, consider using 80MHz channels instead of 160MHz. 80MHz gives you 14 non-overlapping options in the 6GHz US band, almost doubling the number of cells that can operate independently without channel reuse.
After implementing your new channel plan, wait 24 hours for traffic patterns to stabilize, then re-run your SNR monitoring and throughput tests. Compare results against your baseline measurements to confirm that interference levels have decreased.
Step 12: Reduce Transmit Power to Limit Interference Radius
High transmit power on your 6GHz access points is not always better. Transmitting at maximum power increases your coverage radius but also increases the area over which your signal can interfere with neighboring networks. Reducing transmit power to match your actual coverage needs is a practical way to reduce the interference your own network causes and to reduce the impact of distant networks on yours.
The logic is straightforward. If your access point transmits at full power and reaches 100 feet in every direction, it can potentially be heard by neighboring networks up to 100 feet away, and it can hear their signals in return. If you reduce power so your access point reaches only 50 feet, you eliminate interference from and to networks that are between 50 and 100 feet away.
To find the right transmit power for your 6GHz access point:
Start with the coverage area you actually need to serve. Place test devices at the edges of the intended coverage area and measure RSSI. Adjust transmit power until devices at the coverage boundary show RSSI between -65 dBm and -75 dBm. This level provides reliable connectivity at the boundary while minimizing the signal’s reach beyond your intended service area.
Most modern enterprise access points support automatic transmit power control (ATPC), which continuously adjusts transmit power based on client feedback and channel conditions. If your access point supports this feature, enabling it gives you dynamic interference management without requiring manual adjustment.
For Standard Power 6GHz access points using AFC, the AFC system itself may impose maximum power limits for certain channels at your location. Respect these limits. They exist to protect licensed incumbent users from interference caused by your WiFi network.
Step 13: Firmware Updates and Driver Updates as an Interference Fix
A frequently overlooked cause of interference-like behavior on 6GHz networks is outdated firmware on access points and outdated wireless drivers on client devices. Firmware and driver updates often include improvements to interference detection algorithms, channel selection logic, and radio frequency management that can dramatically improve performance without any hardware changes.
Outdated access point firmware may use a less accurate automatic channel selection algorithm that chooses channels with higher interference potential. Updated firmware often includes improved RF scanning that makes better channel decisions based on current channel conditions rather than historical data.
To check and update firmware on your access point:
Log into the access point’s administration interface and navigate to the firmware or software update section. Compare the currently installed firmware version against the latest available version on the manufacturer’s support website. If a newer version is available, download and install it following the manufacturer’s instructions, which typically require a brief reboot of the access point.
On client devices, outdated wireless drivers can cause devices to misreport channel conditions to the access point, interfering with the access point’s ability to make good scheduling decisions. Update wireless drivers on laptops, desktops, and other WiFi 6E client devices through the device manufacturer’s website or through the operating system’s update mechanism.
After updating both access point firmware and client drivers, re-test your 6GHz performance. It is not uncommon for a firmware update alone to resolve interference symptoms that persisted despite correct channel planning, because the updated firmware’s interference detection and channel switching logic is significantly more effective.
Step 14: Document and Report Licensed Incumbent Interference
If your spectrum analysis reveals that a licensed incumbent service such as a fixed satellite earth station or a point-to-point microwave backhaul link is causing interference to your 6GHz network, you need a structured approach to documentation and reporting rather than attempting to change your channel away from the problem. In cases where incumbent interference is severe and unavoidable through channel selection, formal reporting to regulatory authorities may be necessary.
Start by documenting the interference thoroughly. Record spectrum analyzer screenshots showing the interference pattern, noting the center frequency, signal strength, and time of occurrence. If the interference appears at regular intervals, document the timing pattern. Collect at least 3 to 5 separate interference events to establish a consistent pattern.
Note the GPS coordinates of your access point location and the direction the interference appears to originate from if your spectrum analyzer supports directional analysis. This geographic information is valuable for regulators investigating incumbent interference complaints.
In the United States, interference involving licensed services should be reported to the FCC through the Interference Reporting system on the FCC website. Provide all your documented evidence including spectrum captures, location information, timing patterns, and the impact on your network performance.
While waiting for regulatory resolution, mitigate the impact by choosing channels as far as possible from the incumbent’s operating frequency. AFC systems in Standard Power deployments are specifically designed to prevent this type of conflict, so if you are using Standard Power mode and experiencing incumbent interference, the first step is to verify that your AFC system is operating correctly and is using current incumbent location data.
Frequently Asked Questions
What is the most common cause of interference on 6GHz WiFi channels?
The most common cause of interference on 6GHz channels is co-channel interference from neighboring networks that use the same channel. In dense environments like apartment buildings and office complexes, multiple independent networks often gravitate toward the same popular default channels, creating channel congestion. The fix is to scan for neighboring networks and manually select a channel that no neighboring network uses.
Can microwave ovens interfere with 6GHz WiFi?
No. Microwave ovens operate at approximately 2.45 GHz and interfere only with 2.4GHz WiFi networks. The 6GHz band is far enough from the microwave oven’s operating frequency that no interference occurs. This is one of the genuine advantages of 6GHz over 2.4GHz for kitchen and break room deployments.
Why does my 6GHz WiFi speed drop even though no other network is on my channel?
If no WiFi network shares your channel but performance still drops, the cause is likely a non-WiFi interference source. A spectrum analyzer can reveal energy from licensed microwave backhaul links, radar systems, or rogue transmitters that a standard WiFi scan cannot detect. Alternatively, the issue may be a physical propagation problem such as heavy wall attenuation or multipath reflection rather than RF interference.
How do I know if AFC is causing my 6GHz access point to underperform?
Check your access point’s system log or event log for AFC-related entries. Messages indicating failed AFC queries, timeout errors, or channel restrictions imposed by the AFC server will appear in the log. You can also check the current approved channel list returned by the AFC server through your access point’s management interface. If the AFC system has restricted access to channels you want to use, contact your AFC service provider to verify that your location data and antenna characteristics are entered correctly.
Is a 160MHz channel width always better on 6GHz?
Not always. Wider channels deliver higher peak throughput for individual devices but consume more spectrum, leaving fewer non-overlapping channel options. In environments with multiple access points or many neighboring networks, 80MHz channels often deliver better overall performance than 160MHz channels because they allow more parallel non-overlapping cells. Use 160MHz channels only when you have confirmed that no neighboring network overlaps with your chosen channel at that width.
What is a PSC channel and why does it matter for interference?
A Preferred Scanning Channel (PSC) is one of 15 predefined 20MHz channels in the 6GHz band that WiFi 6E and WiFi 7 devices scan first when searching for networks. The 15 PSC channels are: 5, 21, 37, 53, 69, 85, 101, 117, 133, 149, 165, 181, 197, 213, and 229. Configuring your access point’s primary channel on a PSC reduces device connection time and ensures proper operation of the 6GHz network discovery process. PSC alignment also helps you manage channel planning because the PSC grid provides natural, regularly spaced channel boundaries to organize your channel assignments.
How often should I re-check for 6GHz interference on my network?
Re-check for interference whenever you notice performance degradation, after any significant changes to your physical environment or neighboring networks, and proactively every 3 to 6 months in dynamic environments like offices or apartment buildings where neighboring networks change frequently. Setting up automated SNR monitoring on your access point provides continuous passive interference monitoring so you are alerted to new interference sources without waiting for users to report problems.
Hi, I’m Siya — the founder and writer behind Craftifyy.com. I’m a tech enthusiast who loves reviewing gadgets, comparing products, and helping people make smarter buying decisions. Got a question? Feel free to reach out!