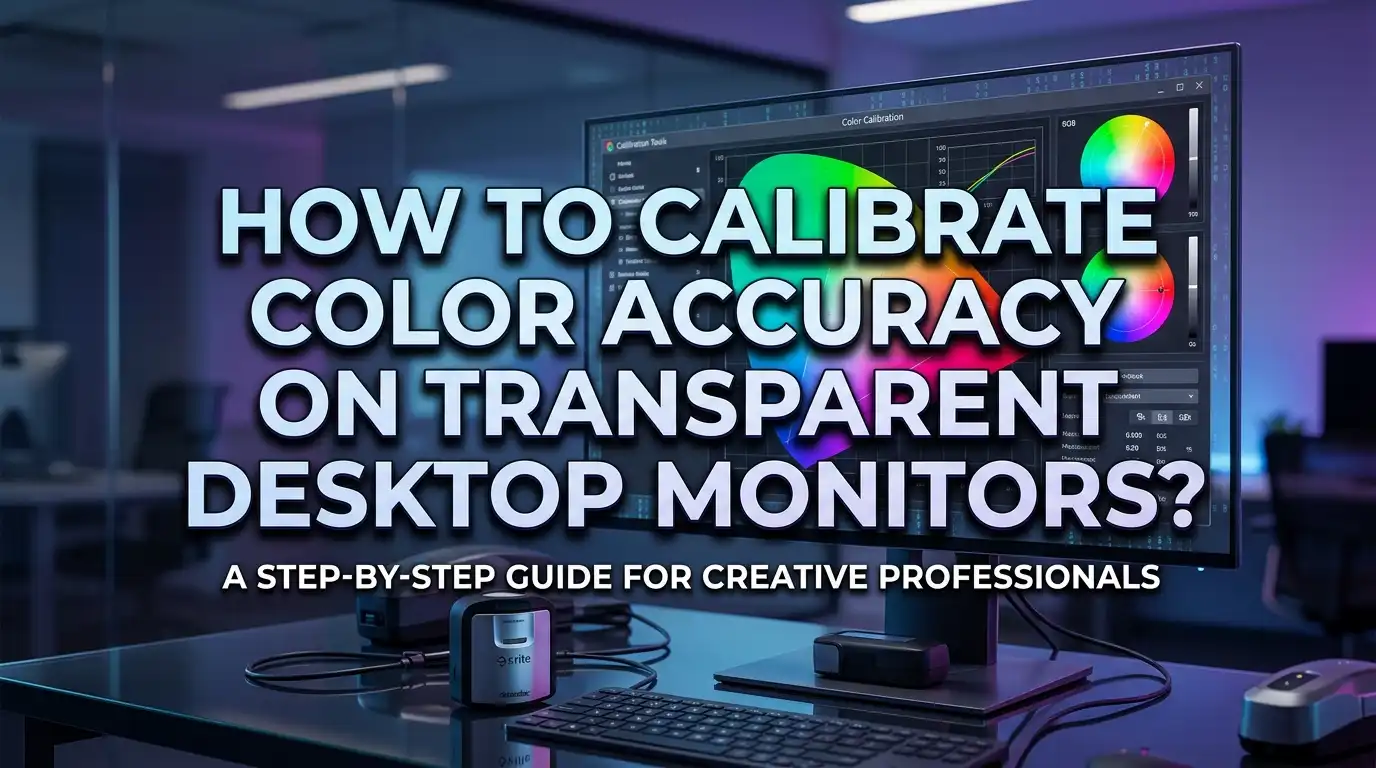
How To Calibrate Color Accuracy On Transparent Desktop Monitors?
Transparent desktop monitors are no longer science fiction. They sit on desks right now, blending digital content with the physical world behind the screen. But there is a catch. Color accuracy on these displays is tricky to get right. The see through nature of the panel means ambient light, background objects, and the transparency level itself all affect how colors appear on screen.
If you work in graphic design, video editing, photography, or any field where color matters, you need a properly calibrated transparent monitor. Without calibration, your reds might look washed out, your blues might shift toward purple, and your whites might carry a yellow or green tint.
The good news is that calibrating a transparent desktop monitor is entirely possible. It just requires a slightly different approach than calibrating a standard LCD or OLED panel.
This guide walks you through every step of the process. You will learn how transparent displays differ from traditional monitors, what tools you need, how to control ambient light interference, and how to build a custom color profile that makes your screen display accurate, reliable colors.
Key Takeaways
- Transparent monitors require special calibration considerations because light passes through the panel from behind, which directly affects perceived color, contrast, and brightness levels on the screen.
- A hardware colorimeter is essential for accurate calibration on transparent displays. Software based calibration tools built into Windows or macOS are a starting point, but they cannot measure the unique light interference that transparent panels introduce.
- Ambient light control is the single most important factor in getting reliable color accuracy from a transparent monitor. The background behind your screen and the lighting in your room will change how every color looks.
- ICC profiles must be created specifically for your transparent monitor and your working environment. Generic profiles from the manufacturer will not account for your room’s lighting conditions or your chosen transparency level.
- Regular recalibration is necessary because OLED based transparent panels degrade over time, and even micro LED or mirror based systems shift as components age. Calibrate every two to four weeks for professional work.
- You can achieve professional grade color accuracy on a transparent desktop monitor if you follow a structured calibration process and maintain consistent environmental conditions while working.
Understanding How Transparent Desktop Monitors Display Color
Transparent desktop monitors produce color differently than standard screens. A traditional LCD monitor uses a backlight that shines through liquid crystal layers and color filters. A transparent display removes or reduces that opaque backlight layer. This allows light from behind the screen to pass through to your eyes.
Transparent OLED panels use organic light emitting diodes where each pixel generates its own light. The pixel structure includes red, green, blue, and clear subpixels. The clear subpixels allow transparency. This means roughly 40% of the panel surface is dedicated to letting light through, which reduces the overall light output available for displaying color.
Mirror based transparent monitors like the Phantom use a different method entirely. The actual display panel sits below or beside the glass, and the image is reflected onto a transparent surface. This approach can deliver higher brightness levels (up to 5,000 nits in some cases) but introduces reflection artifacts that affect color perception.
Micro LED transparent displays, showcased by Samsung at CES 2026, use tiny inorganic LEDs mounted on transparent substrates. These offer excellent brightness and color gamut but are still in early stages for desktop use.
The key point for calibration is this: every transparent display technology lets environmental light mix with the displayed image. This light mixing changes the apparent color of everything on screen. A pure red pixel will look different against a white wall than it will against a dark bookshelf. Understanding this fundamental behavior is the first step toward proper calibration.
Why Standard Calibration Methods Fall Short For Transparent Displays
Standard monitor calibration assumes a simple model. The screen emits light. Your colorimeter measures that light. The software creates a correction profile. This works because a traditional monitor has an opaque back panel that blocks all external light from mixing with the displayed image.
Transparent monitors break this assumption completely. Light from behind the screen passes through the panel and reaches the colorimeter sensor along with the light emitted by the display itself. This means your colorimeter is measuring two light sources at once: the pixel output and the ambient background.
If you attach a colorimeter directly to a transparent screen and run a standard calibration routine, the resulting profile will be inaccurate. The profile will include compensation for the background light that was present during calibration. If that background changes (someone turns on a lamp, the sun moves, you rearrange your desk), the profile becomes wrong.
Standard calibration software like DisplayCAL, i1Profiler, or the built in Windows Display Color Calibration tool was not designed with transparent panels in mind. These programs expect a fully opaque display surface. They do not account for variable transparency levels, changing backgrounds, or light bleed through the panel.
This does not mean calibration is impossible. It means you need to modify your approach. You must control the environment behind the screen, use specific colorimeter placement techniques, and potentially create multiple profiles for different working conditions. The following sections explain exactly how to do this.
Essential Tools You Need Before Starting Calibration
Before you begin calibrating your transparent desktop monitor, gather the right equipment. Using the correct tools makes the difference between a rough visual estimate and a scientifically accurate color profile.
A hardware colorimeter is the most important tool. Devices like the Calibrite ColorChecker Display, Datacolor SpyderX series, or X Rite i1Display series physically measure the light coming from your screen. They contain optical sensors and color filters that read precise color values. For transparent displays, a colorimeter with an ambient light measurement function is especially useful because it can help you quantify how much environmental light is affecting your readings.
You also need calibration software that gives you manual control over settings. DisplayCAL is a popular free option that provides detailed control over white point, gamma, luminance targets, and black level. It works with most colorimeters and creates standard ICC profiles. Commercial options like i1Profiler from X Rite offer streamlined workflows and additional features.
A light blocking hood or black fabric is essential for transparent monitor calibration. You will need this to place behind the screen during calibration to block ambient light from passing through the panel. This isolates the display’s own light output so your colorimeter gets a clean measurement.
A lux meter (or the ambient light function on your colorimeter) helps you measure room brightness. Knowing your ambient light level lets you set an appropriate monitor luminance target. For most indoor environments, 80 to 120 cd/m² is a good target for color critical work.
Finally, keep a notepad or spreadsheet to record your calibration settings, room conditions, and the date. This log helps you track changes over time and makes recalibration faster.
Controlling Ambient Light And Background For Accurate Results
Ambient light management is the single biggest challenge with transparent monitor calibration. The light that passes through the screen from behind directly alters every color you see. If you skip this step, nothing else in the calibration process will produce reliable results.
Start by examining what sits behind your transparent monitor. A bright window will flood the panel with variable daylight that changes by the hour. A white wall will reflect room lighting through the screen. A dark bookshelf will absorb light and make your display appear more contrasty. Each of these backgrounds produces a different color shift on the display.
For calibration itself, place a matte black panel or thick black fabric directly behind the screen. This blocks all pass through light and creates a controlled baseline. Your colorimeter will then measure only the light produced by the display’s pixels. This is the most accurate way to create your base ICC profile.
For daily use after calibration, you have two practical options. The first is to keep a consistent, neutral gray or dark background behind the monitor at all times. This provides a predictable and minimal color shift. The second option is to use the monitor’s opacity control (if available) to increase opacity to 100% during color critical tasks. Some transparent monitors offer this feature, which effectively turns the display into a standard opaque screen when you need it.
Control room lighting as well. Overhead fluorescent lights cast a different color temperature than warm desk lamps. Use D50 or D65 rated lighting in your workspace for color critical tasks. These daylight balanced lights create a neutral viewing environment that matches industry standards for print and digital color work.
Step By Step Hardware Colorimeter Calibration Process
Here is the practical process for calibrating your transparent desktop monitor using a hardware colorimeter. Follow these steps in order for the best results.
Step 1: Prepare the environment. Place your black backing material behind the transparent monitor. Close blinds or curtains to reduce variable light. Turn on your standard workspace lighting and let it stabilize for 15 minutes. Let the monitor warm up for at least 30 minutes so the panel reaches a stable operating temperature.
Step 2: Reset the monitor’s OSD settings. Open the on screen display menu and set brightness, contrast, and color settings to their default values. If your monitor has a color mode preset like sRGB or DCI P3, select the mode that matches your primary workflow. For general purpose work, sRGB is the safest starting point.
Step 3: Launch your calibration software. Open DisplayCAL or your preferred calibration application. Select your colorimeter from the device list. Choose your target settings: a white point of D65 (6500K) is standard for digital work, D50 (5000K) is standard for print. Set your target gamma to 2.2 for Windows workflows or the sRGB tone response curve. Set your target luminance to 80 to 120 cd/m² depending on your room brightness.
Step 4: Attach the colorimeter to the screen. Place the device flat against the transparent panel’s front surface. Make sure it sits snugly with no light leaks around the edges. The suction cups or counterweight should hold it securely without pressing too hard on the panel.
Step 5: Run the calibration and profiling routine. The software will display a series of color patches. Your colorimeter will measure each one. This process typically takes 10 to 30 minutes depending on accuracy settings. Do not disturb the room lighting or the screen during this process.
Step 6: Save and apply the ICC profile. Once profiling completes, save the resulting ICC file and set it as the default profile for this display in your operating system.
Setting The Correct White Point And Gamma Targets
White point and gamma are two foundational settings that determine how every color appears on your monitor. Getting these right is critical, and transparent monitors add extra considerations to the process.
The white point defines what “white” looks like on your screen. It is measured in Kelvin (K) and corresponds to a color temperature. A white point of 6500K (called D65) produces a neutral daylight white. A white point of 5000K (called D50) produces a slightly warmer white used in print proofing. For most digital creative work on a transparent monitor, D65 is the standard choice.
On a transparent display, the background behind the screen can shift the perceived white point. If warm afternoon sunlight streams through the panel, your whites will appear warmer than calibrated. This is why the black backing during calibration is so important. It ensures your calibrated white point reflects the actual pixel output, not a blend of pixel output and background light.
Gamma controls the brightness distribution between pure black and pure white. A gamma of 2.2 is the standard for Windows and web content. The sRGB specification uses a similar tone response curve. For video work, you might target BT.1886 gamma, which is designed for broadcast content.
On OLED based transparent monitors, achieving accurate gamma can be easier than on LCDs because each pixel produces its own light. There is no backlight bleed to distort the shadow details. However, the clear subpixels in a transparent OLED panel can let ambient light raise the apparent black level, which compresses the effective gamma range. This makes ambient light control doubly important for gamma accuracy.
Set your targets in your calibration software before you start the profiling process. Do not guess or estimate these values. Use the numeric inputs in the software to enter exact figures.
Creating And Installing Custom ICC Profiles
An ICC profile is a small file that tells your operating system and applications how to translate color data for your specific monitor. It corrects for the unique color characteristics of your display so that colors appear accurate and consistent.
After your colorimeter finishes measuring your transparent monitor, the calibration software generates this profile automatically. It contains data about your screen’s color gamut (the range of colors it can display), its white point, its gamma response, and its brightness levels. The profile maps these measured values against a standard reference so the system knows how to adjust the signal sent to the monitor.
To install the profile on Windows, go to Settings, then System, then Display, then Advanced Display Settings. Click on Display Adapter Properties, open the Color Management tab, and click Color Management. In the window that opens, select your transparent monitor from the device list. Click Add and browse to your ICC profile file. Select it, then click “Set as Default Profile.” Make sure the checkbox for “Use my settings for this device” is enabled.
On macOS, go to System Settings, then Displays, then click the Color Profile dropdown. Select “Customize” at the bottom of the list. You can then add your custom ICC profile to the list and select it as the active profile for your transparent monitor.
Important note for transparent monitors: the ICC profile you create is only accurate for the lighting conditions present during calibration. If you change your workspace lighting or the background behind the monitor, consider creating additional profiles for those conditions. You can switch between profiles manually or use a profile switching utility to match different work scenarios.
Adjusting Transparency Levels For Color Critical Work
Many transparent desktop monitors offer adjustable transparency or opacity settings. This feature is one of your most powerful tools for managing color accuracy. Understanding how to use it can dramatically improve the reliability of your on screen colors.
When the display operates at full transparency, maximum ambient light passes through the panel. This creates the most dramatic visual effect but also introduces the most color interference. Every color on screen becomes a blend of pixel output and background light. Fine color distinctions become harder to see, and calibration accuracy drops.
Reducing transparency (increasing opacity) progressively blocks more background light. Some monitors allow continuous adjustment, while others offer preset levels. For color critical tasks like photo retouching, color grading video, or proofing print layouts, set the opacity as high as possible. If your monitor supports 100% opacity, use it during these tasks. You get the accuracy benefits of a standard monitor while keeping the transparent mode available for other workflows.
For general productivity tasks where color accuracy is important but not mission critical (like web browsing, reading documents, or casual image viewing), a moderate transparency level works well. Set the opacity to around 60% to 70% for a good balance between transparency aesthetics and color reliability.
Document your preferred transparency setting in your calibration log. If you calibrated at full opacity, your ICC profile is most accurate at that setting. Using a different transparency level during daily work means the profile will not perfectly match. Some professionals create two or three profiles at different transparency levels and switch between them depending on the task. This takes more time upfront but delivers better accuracy across all your working modes.
Dealing With OLED Specific Challenges On Transparent Panels
OLED technology powers most transparent desktop monitors available today. While OLED delivers stunning contrast and vibrant colors, it introduces calibration challenges that you need to address.
Pixel brightness variation (called ABL or automatic brightness limiting) is common on OLED panels. When a large portion of the screen displays bright content, the panel automatically reduces brightness to prevent overheating and manage power consumption. This means a full screen white will be dimmer than a small white window on a dark background. During calibration, this behavior can skew your luminance measurements.
To minimize ABL interference during calibration, set your calibration software to use smaller test patches rather than full screen swatches. DisplayCAL allows you to configure the patch size. A patch size of about 10% to 20% of the screen area reduces ABL activation and gives you more accurate readings.
Burn in risk is higher on OLED transparent displays. Static content displayed for extended periods can leave permanent ghost images. Calibration test patterns are displayed only briefly, so they are unlikely to cause burn in during a single session. However, if you use an always on color reference patch for visual spot checking, keep it moving or limit its display time.
White level drift is another OLED behavior that affects calibration. As the panel warms up, its brightness output can shift slightly. This is why warming up the display for 30 minutes before calibration is important. The panel stabilizes after this warm up period, and your measurements will be more consistent.
The wide color gamut of OLED panels is an advantage for creative professionals. Most transparent OLEDs cover 100% of sRGB and a significant portion of DCI P3. Your calibration profile will map this gamut accurately so applications that support color management display colors correctly within your chosen working space.
Using Software Calibration Tools Built Into Your Operating System
Hardware colorimeters deliver the most accurate results, but your operating system includes built in calibration tools that can help with basic adjustments. These software tools are useful as a starting point or as a supplement to hardware calibration.
On Windows 10 and 11, type “Calibrate display color” in the search bar and open the tool. It walks you through adjusting gamma, brightness, contrast, and color balance using visual test patterns. You compare on screen images and adjust sliders until the patterns look correct to your eyes. The limitation is that this method relies on your visual perception, which can be influenced by fatigue, ambient light, and the transparent panel’s background.
The tool asks you to adjust gamma first by matching gray boxes to a reference image. Then it guides you through brightness and contrast adjustments using shadow detail and highlight clipping patterns. Finally, you adjust the color balance by modifying red, green, and blue slider levels to achieve a neutral gray.
On macOS, open System Settings, go to Displays, click the Color Profile dropdown, and select “Customize.” Click the plus (+) button to open the Display Calibrator Assistant. This tool guides you through setting a target white point and gamma. Expert mode provides more control points for a more detailed calibration curve.
For transparent monitors specifically, these built in tools have a significant weakness. They cannot distinguish between light from the display and light from the background passing through the panel. Your visual adjustments will compensate for the combined light, producing a profile that only works under the exact same background and lighting conditions.
Use these tools for initial setup or quick adjustments. For any work where color accuracy matters professionally, invest in a hardware colorimeter and use dedicated calibration software.
Calibrating For Specific Color Spaces And Professional Workflows
Different professional workflows require different color space targets. Your calibration settings should match the color space you work in most frequently.
sRGB is the standard color space for web design, general photography, and most digital content. It covers a moderate color range and is supported by virtually every device and application. If your work will be viewed primarily on standard monitors and screens, calibrate your transparent monitor to sRGB. Set the gamut in your calibration software to sRGB, the white point to D65, and the gamma to sRGB (approximately 2.2).
DCI P3 is used in digital cinema and increasingly in high end content creation. It covers about 25% more color area than sRGB, particularly in reds and greens. Apple devices use a variant called Display P3. If you create content for film, streaming, or Apple platforms, calibrating to DCI P3 gives you a more accurate preview. Many transparent OLED monitors can cover 90% or more of DCI P3 natively.
Adobe RGB is popular in print photography because it encompasses more colors that CMYK printers can reproduce. If your work goes to print, especially large format or fine art printing, an Adobe RGB calibration target is appropriate.
For video professionals working in Rec. 709 (HD broadcast standard), the color gamut is essentially the same as sRGB, but the gamma target should be BT.1886 instead of sRGB gamma. This distinction matters for accurate shadow rendering in video content.
Your calibration software lets you select these targets before running the profiling process. The colorimeter will then measure your transparent display and create a profile that maps its native output to your chosen target space. Applications that support color management (Photoshop, Lightroom, DaVinci Resolve, Premiere Pro) will use this profile to display colors accurately within that space.
How Often Should You Recalibrate Your Transparent Monitor
Recalibration frequency depends on how critical color accuracy is for your work and what type of transparent display technology you use. For professional creative work, recalibrate every two to four weeks.
OLED based transparent monitors experience gradual changes in pixel brightness and color output as the organic materials age. The blue subpixels typically degrade fastest, which can introduce a slight yellow or warm shift over time. Regular recalibration catches these shifts before they become visible enough to affect your work.
Environmental changes also demand recalibration. If you move your monitor to a new desk, change your room lighting, repaint a wall behind your screen, or adjust your workspace layout, the light passing through the transparent panel will change. Any of these events should trigger a fresh calibration session.
Seasonal changes in daylight can affect your workspace too. In winter, shorter days mean more artificial light in your room during working hours. In summer, longer daylight hours bring more natural light and potentially more light passing through the panel. Professionals in rooms with windows near their monitors should consider seasonal recalibration.
Software and driver updates can also reset color profiles. After a major operating system update or graphics driver update, check that your ICC profile is still active and applied correctly. Some updates reset color management settings to defaults without warning.
Keep your colorimeter stored properly between uses. Avoid exposing it to extreme temperatures or direct sunlight, as this can damage the optical filters inside and reduce its measurement accuracy. Most colorimeter manufacturers recommend replacing the device every three to five years as the filters age and drift.
Troubleshooting Common Color Issues On Transparent Monitors
Even after careful calibration, you may encounter color issues with your transparent desktop monitor. Here are the most common problems and their solutions.
Colors look different at various times of day. This happens because daylight changes the light passing through the transparent panel. The fix is to use blackout curtains or a physical backing behind the monitor during color critical work. Alternatively, increase the monitor’s opacity setting to reduce light transmission.
Calibration looks good in the center but not at the edges. Transparent OLED panels can show slight color and brightness variations across the surface. This is normal to a degree, but if the variation is severe, try recalibrating with the colorimeter placed at different screen positions. Some professionals create an average profile by measuring multiple points.
Colors appear washed out or low in contrast. Excessive ambient light passing through the panel raises the effective black level, which reduces perceived contrast. Reduce the transparency level or add a darker background behind the screen. Also confirm that your monitor’s brightness setting is appropriate for your room. A brighter room needs a brighter screen to maintain contrast.
The ICC profile does not seem to apply. On Windows, open Color Management from the Control Panel and verify the correct profile is associated with your transparent monitor. Make sure “Use my settings for this device” is checked. Some applications (particularly games and video players) bypass ICC profiles entirely, so colors may look different in those programs.
Banding appears in smooth gradients. This can result from aggressive gamma correction in the ICC profile. Try recalibrating with a lower correction strength or using a higher bit depth output (10 bit instead of 8 bit) if your graphics card and monitor both support it.
Best Practices For Maintaining Long Term Color Accuracy
Maintaining color accuracy on a transparent desktop monitor is an ongoing process. A few consistent habits will keep your display performing at its best for years.
First, establish a standard working environment and stick with it. Keep the same lighting setup, the same background behind your monitor, and the same room layout. Consistency is the foundation of reliable color. Every variable you control is one less source of error in your color workflow.
Reduce static content display time on OLED transparent panels. Use screensavers, pixel shift features, or auto sleep settings to prevent burn in. If your monitor has a pixel refresh or panel maintenance function, run it according to the manufacturer’s recommended schedule. Burn in does not just affect image quality; it also degrades color accuracy in the affected areas.
Keep your screen clean. Dust, fingerprints, and smudges on a transparent panel affect light transmission and can cause uneven brightness across the display. Use a soft microfiber cloth and a screen safe cleaning solution. Avoid paper towels, household glass cleaners, or abrasive materials.
Monitor your room’s humidity and temperature. Extreme conditions can accelerate panel degradation, especially for OLED based displays. A comfortable room temperature between 20°C and 25°C (68°F to 77°F) with moderate humidity is ideal.
Finally, keep records of every calibration session. Note the date, colorimeter used, calibration targets, room conditions, and any changes from the previous session. Over time, this log reveals trends such as a gradual blue channel decline or a consistent warm shift that help you anticipate problems and plan maintenance. Treat your transparent monitor like a precision instrument, and it will reward you with accurate, beautiful color for every project.
Frequently Asked Questions
Can I calibrate a transparent monitor without a hardware colorimeter?
You can make basic adjustments using built in software tools in Windows or macOS. These tools let you visually adjust gamma, brightness, contrast, and color balance. However, software calibration alone cannot account for the ambient light passing through a transparent panel. For professional work, a hardware colorimeter is strongly recommended because it provides objective measurements rather than relying on your visual perception, which can be affected by many factors.
Does the background behind my transparent monitor affect color accuracy?
Yes, significantly. The background behind your screen directly changes how colors appear because light from behind passes through the panel and mixes with the displayed image. A bright white wall will wash out colors, while a dark surface will improve contrast. For calibration, always use a black backing to isolate the display’s own output. For daily use, maintain a consistent, neutral background.
How long does it take to calibrate a transparent desktop monitor?
The full process typically takes 45 minutes to an hour. This includes 30 minutes of warm up time for the display, 5 minutes of preparation (setting up the black backing and room lighting), and 10 to 30 minutes for the actual calibration and profiling measurement. Subsequent recalibrations are faster because you already know your target settings and room setup.
Will my calibration profile work if I change the transparency level?
No. Your ICC profile is accurate only for the transparency level and environmental conditions present during calibration. Changing the transparency level alters the amount of ambient light mixing with the displayed image, which shifts color appearance. Create separate profiles for different transparency settings if you regularly switch between modes. Save each profile with a descriptive name so you can quickly switch to the correct one.
What color space should I calibrate my transparent monitor to?
This depends on your primary workflow. sRGB is the standard for web and general digital content. DCI P3 is appropriate for film and streaming content creation. Adobe RGB suits photographers who print their work. Rec. 709 with BT.1886 gamma is correct for broadcast video work. If you are unsure, start with sRGB, as it is the most widely supported color space and provides a solid baseline for most tasks.
Can transparent OLED monitors achieve the same color accuracy as standard OLED monitors?
Transparent OLED monitors can achieve excellent color accuracy when properly calibrated in a controlled environment. The technology offers wide color gamut coverage, high contrast ratios, and per pixel light emission. The main challenge is the ambient light interference from the transparent panel. When you block that interference (using a black backing or full opacity mode), the color performance is comparable to standard OLED displays. The key difference is that maintaining that accuracy requires more environmental control and more frequent calibration.
Hi, I’m Siya — the founder and writer behind Craftifyy.com. I’m a tech enthusiast who loves reviewing gadgets, comparing products, and helping people make smarter buying decisions. Got a question? Feel free to reach out!